By Yiming Li
As an extension of the previous Design Domain Part 1, I have begun to explore further possibilities for this project based on my prior research and experiments. Consequently, in Part 2, I will refine the specific implementation plans for its materialisation and realisation, whilst also addressing the feedback received and the issues identified in Part 1.
This section should focus more on the production aspect, but I feel that before I actually get started, I need to add a few brief points to supplement the primary research I’ve done so far. This additional research wasn’t completed within the last few weeks; two weeks is still a bit of a tight schedule for me, so I had already drawn up a plan before the project began.
It was probably around this winter that I revisited the project brief and reviewed the progress I had made in the first half of the project. I realised a few things—since I had chosen ‘light’ as a medium to explore the influence of matter on light, I should, from now on, set out to capture these effects deliberately. My primary research should be more akin to a process of observation and discovery, leading to personal reflection. At the same time, I should not look at too many things, as this would only serve to confine me; instead, I should observe the ‘small things’.

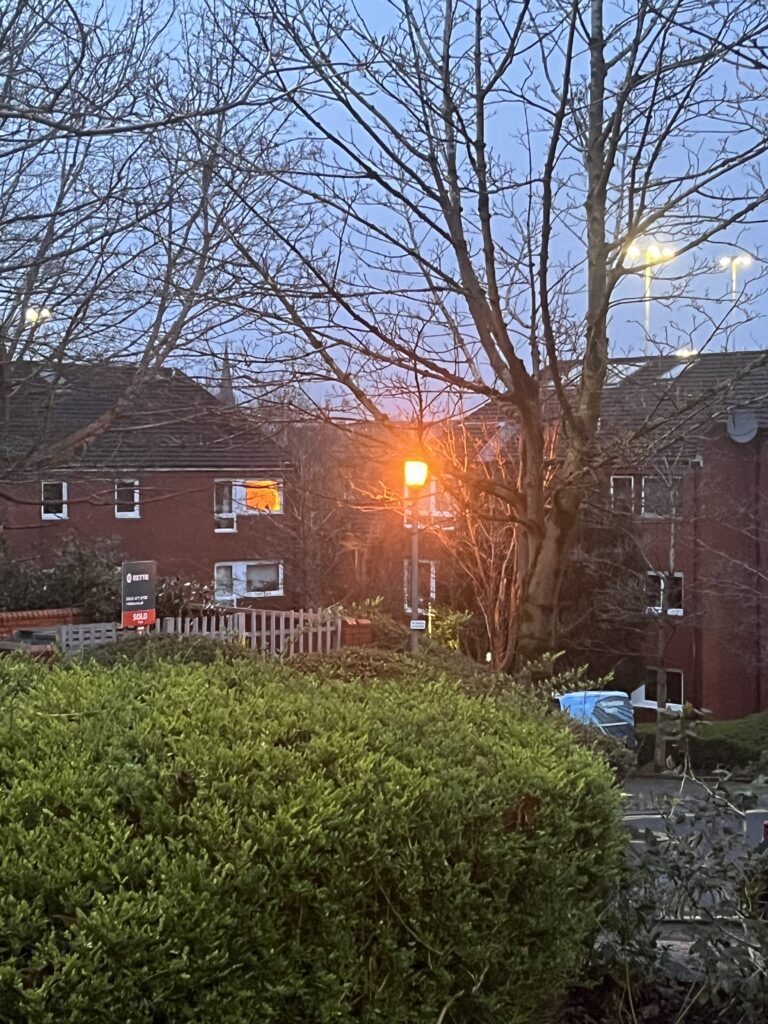
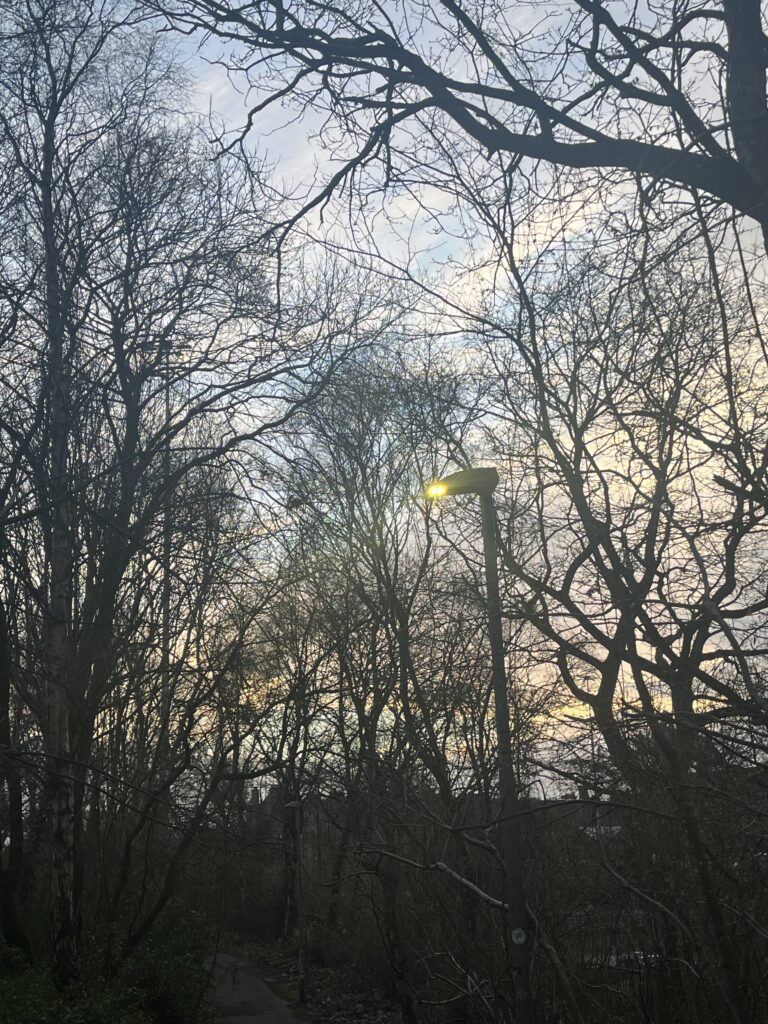
In winter, sunlight is a scarce commodity, and I find it hard to catch many glimpses of natural light in my daily life. Yet the presence of artificial light stands out all the more. Take the streetlamps at four o’clock in the afternoon, for instance: their light filters through yellowed, oxidised shades, flickering dimly. Street signs and neon tubes emit a kaleidoscope of colours; viewed from afar, these beams weave through the gaps between passers-by, piercing their pulled-up collars and fluttering skirts, casting shadows upon the ground. These things are rather intriguing, aren’t they? If I could control these variables—be it the lampshades or the passing pedestrians—they could all be regarded as elements influencing the light. I want to use these elements to make this project sufficiently ‘playful’. Just as in the secondary research covered in the previous section, where the artist Olafur Eliasson used mirrors and coloured glass as mediums to explore the interplay between space and light. But I don’t want the whole project to be serious; rather, I want it to be more fun, sparking a desire to explore.
As the project got underway, my focus shifted back to my ‘Light Box’. In the previous section, I built a simple prototype based on my sketches. However, it was incomplete and the overall layout felt a little disorganised. So, before I began refining it in earnest, I decided to draw up a plan and carry out some tests first.
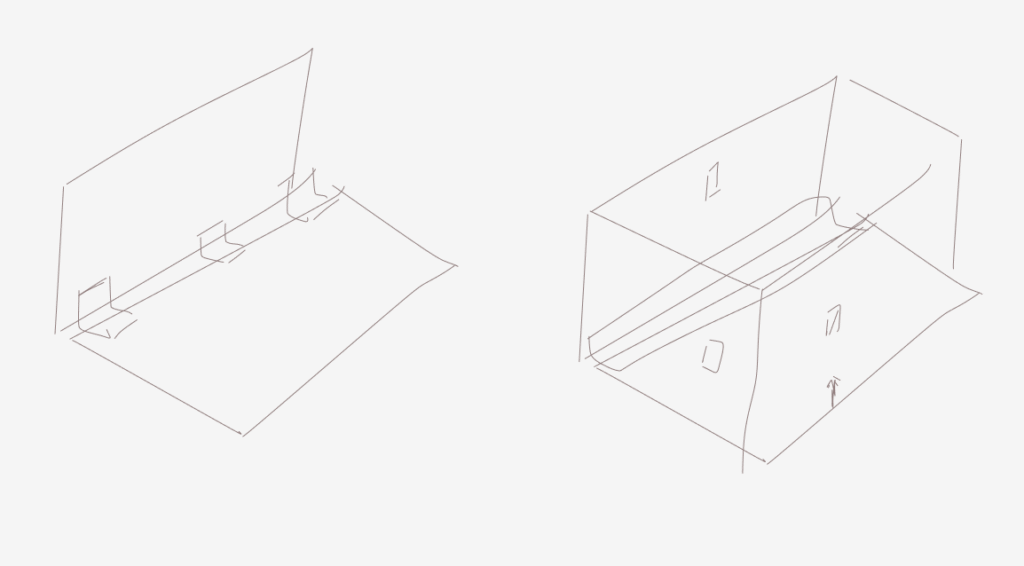
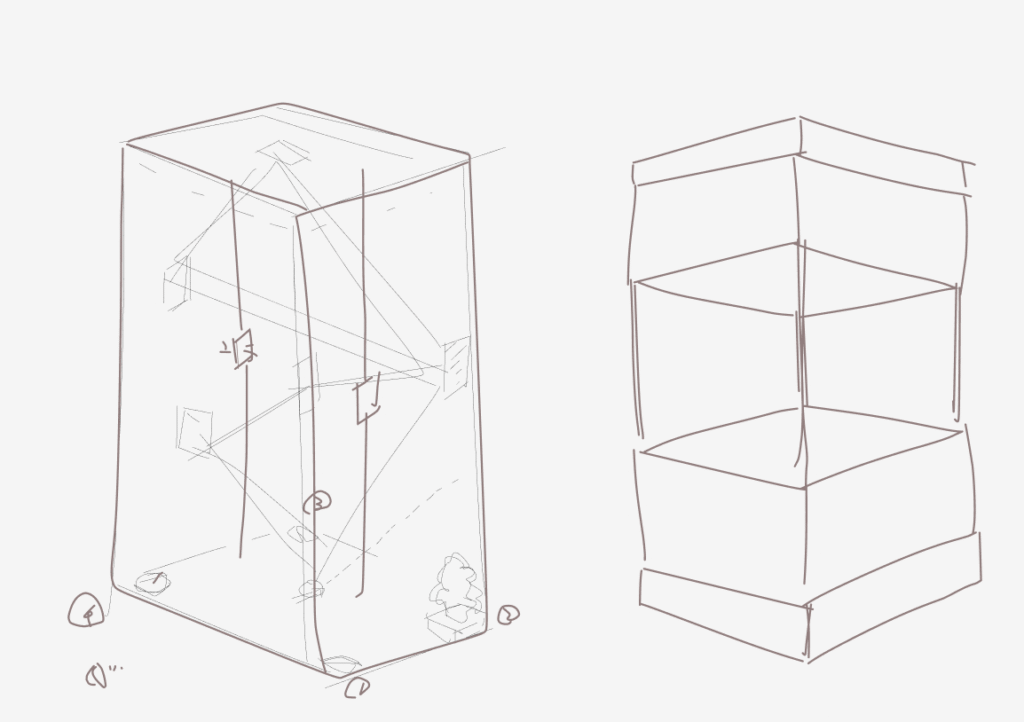
After discussing it with my tutor, I decided to scrap some of the previous, overly complex designs and incorporate new elements that are more interesting and interactive. I first created a mock-up in Blender, as this made it easier for me to get an overall view of the design and make subsequent adjustments.
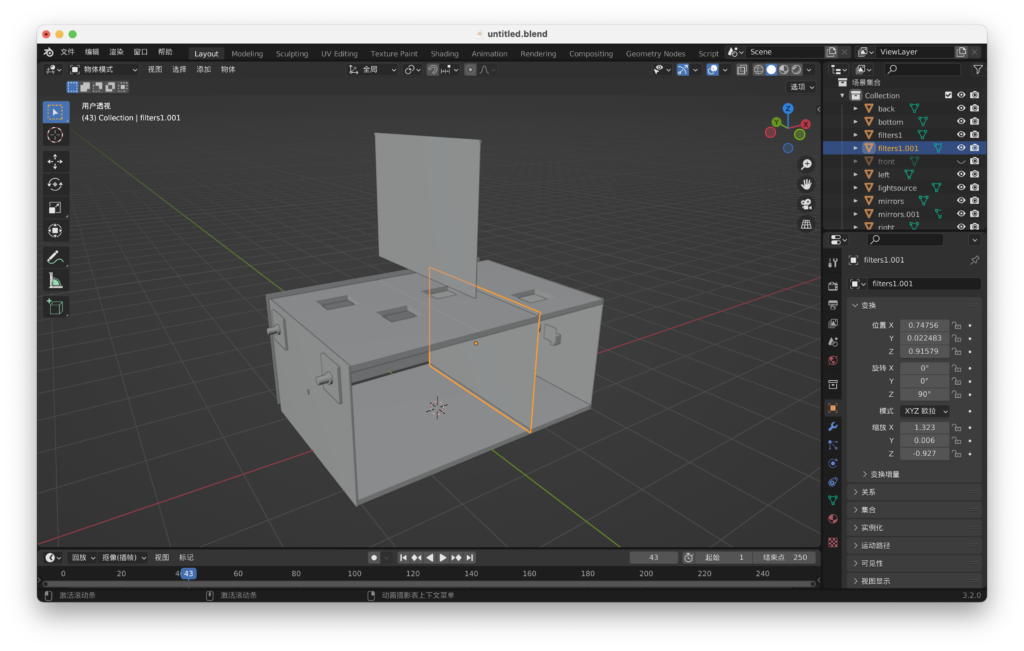
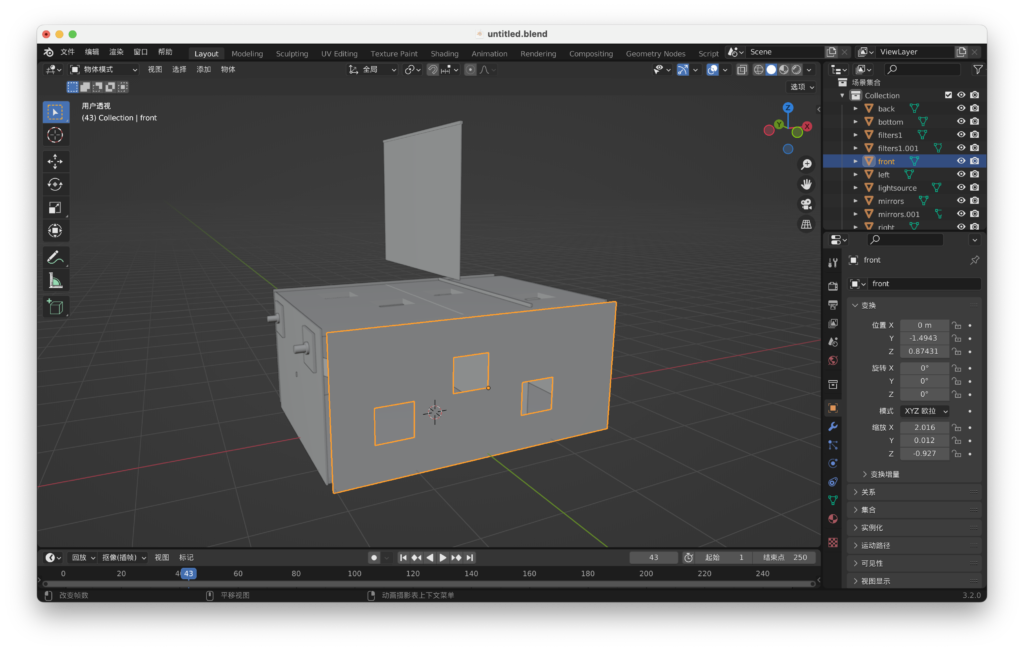
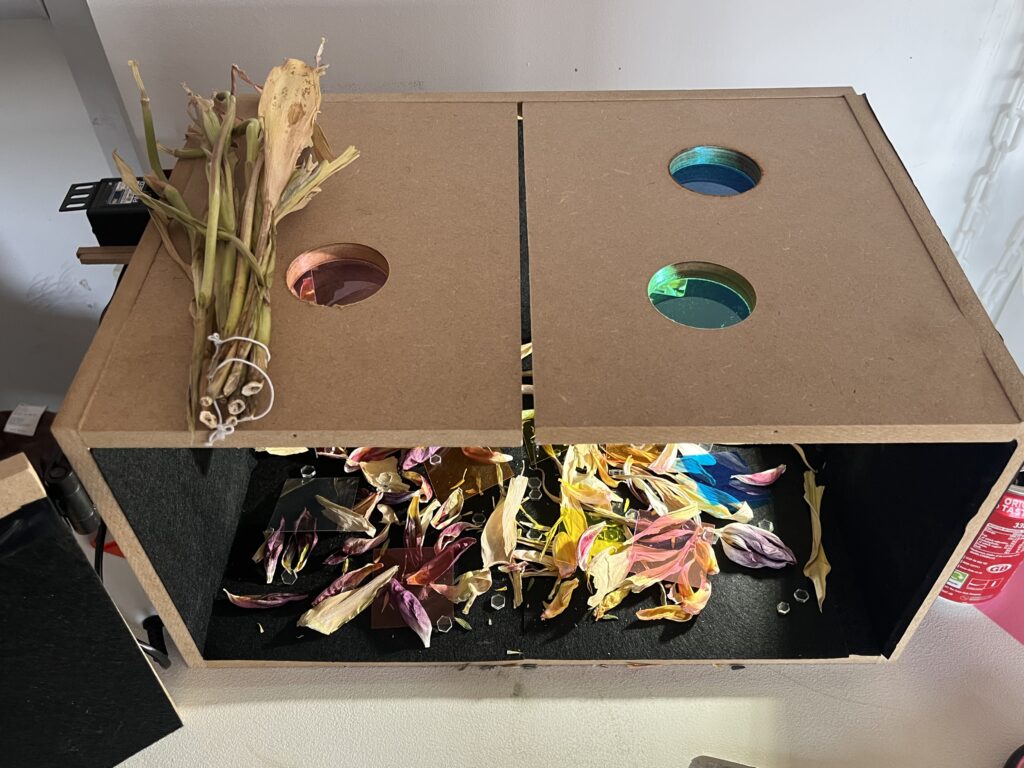
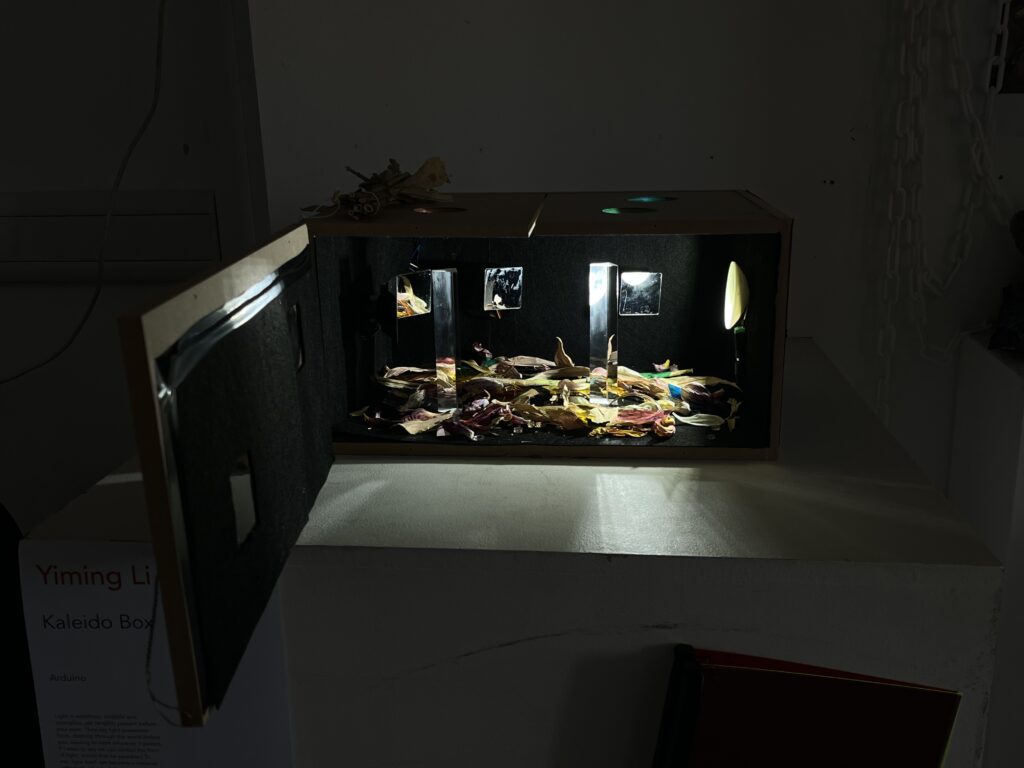
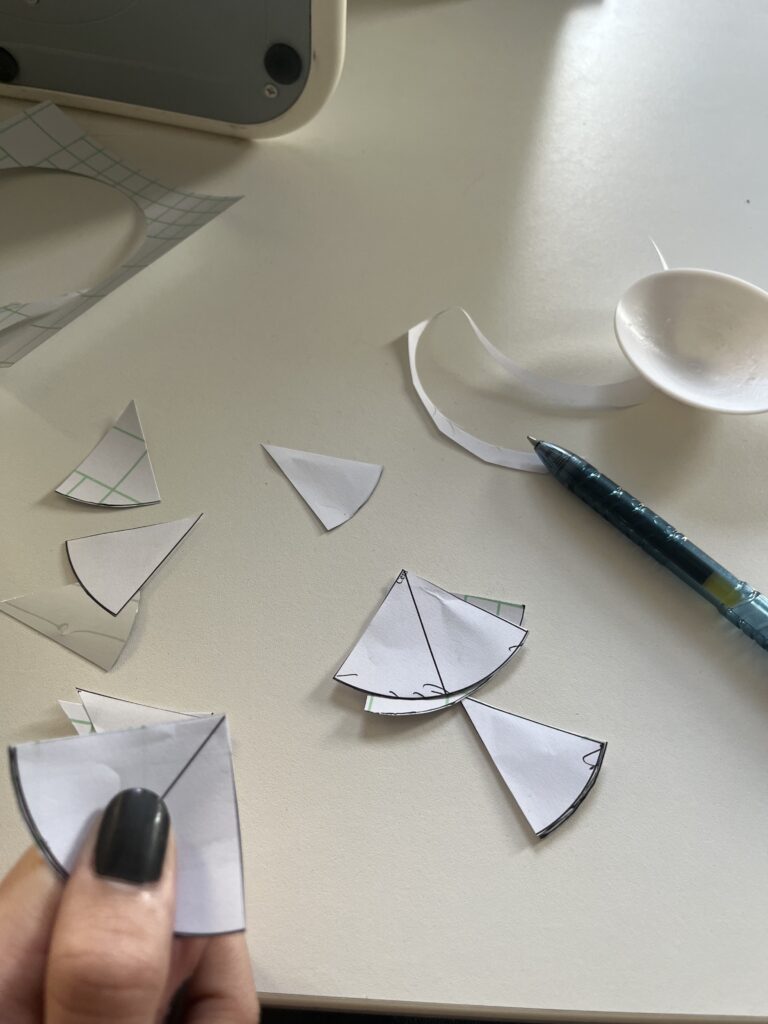
In the modelling phase, I designed the position of every servo、potentiometer and every reflective point (mirror), whilst also adding a new element—replaceable ‘filters’. These are coloured, translucent acrylic panels that can be inserted into the gap in the centre of the box. The inspiration for this element comes from old-fashioned sliding-panel cameras, or beehives. My original plan was to install these acrylic panels inside the box permanently, making them fixed and unchangeable. However, this would have seemed a little dull; as I mentioned, I wanted to make the entire project more ‘playful’. Viewers can slide the panels to swap out different filters and observe how light behaves through various coloured media, a process that undoubtedly adds a sense of interaction and fun. At the same time, I cut out numerous windows in the box, as I wanted to simulate a sense of ‘peeking’. This process is akin to deliberately depriving the viewer of a panoramic view, forcing them to look down and observe the wonders inside the box through small, limited windows from various angles. To me, this is a design full of childlike whimsy; I do not want people to adopt the lofty, critical stance typically associated with viewing art, but rather to experience first-hand the joy and fleeting relaxation that this little toy brings.
I chose wood as the material for the entire box. I am fond of wooden objects; the quality and texture of this material have an innate ‘warmth’ that allows the viewer to handle it with greater ease.
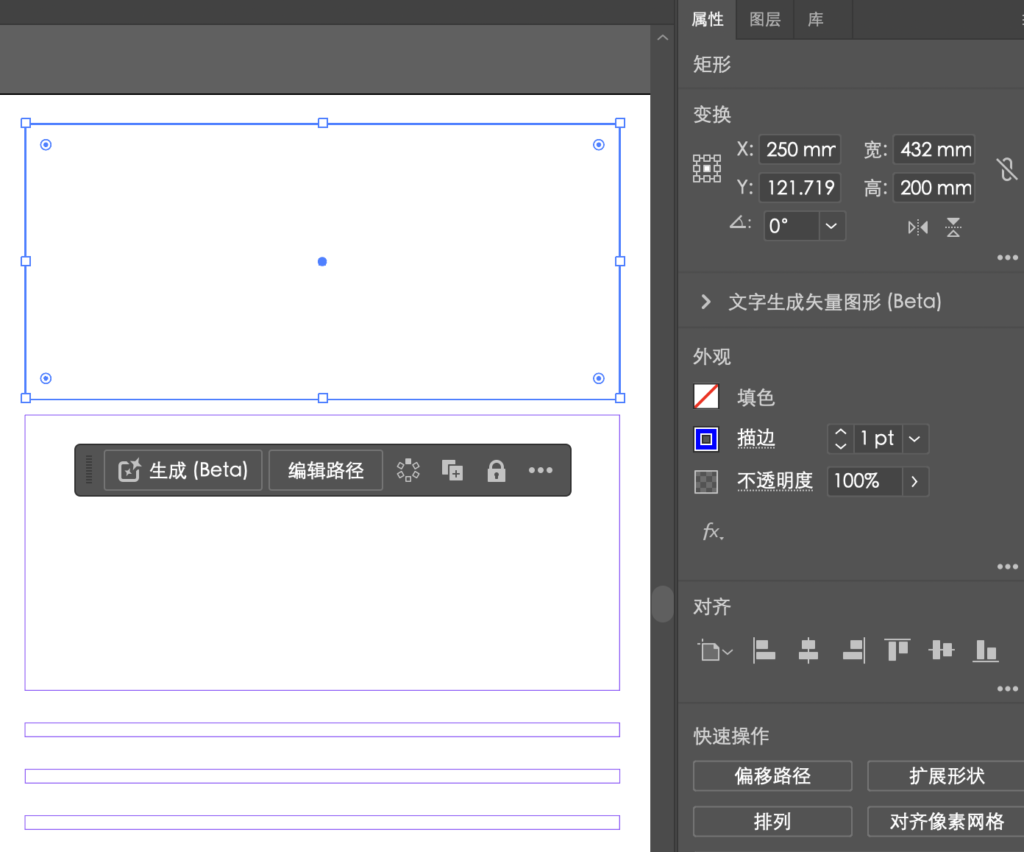
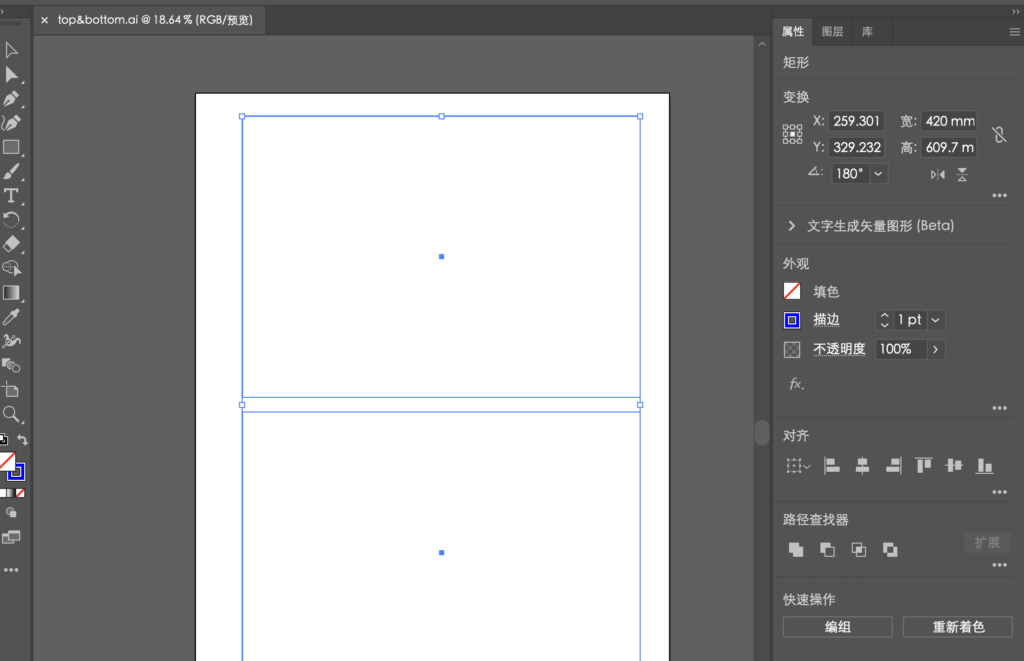
I have calculated the length and volume of every panel in the box and created a precise model in Adobe Illustrator. My plan was to laser-cut them all and then assemble them. Unfortunately, however, all the slots at the school’s laser workshop for the next two weeks are fully booked, so I’ve had to turn to another method—our old friend, woodenwork.
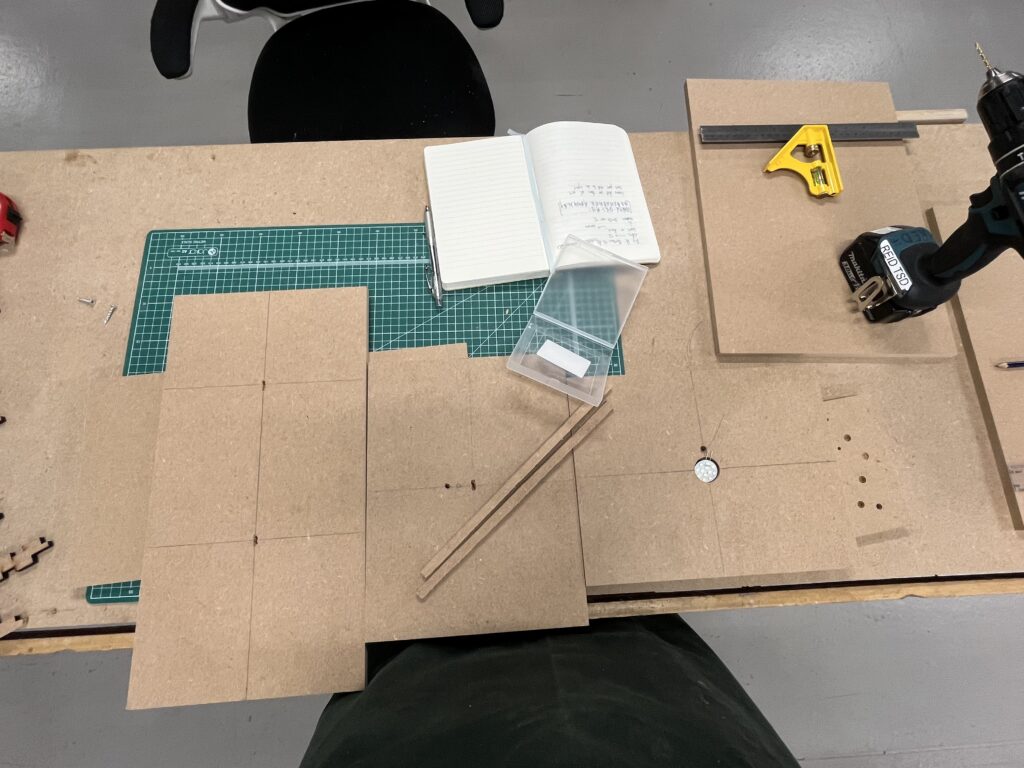
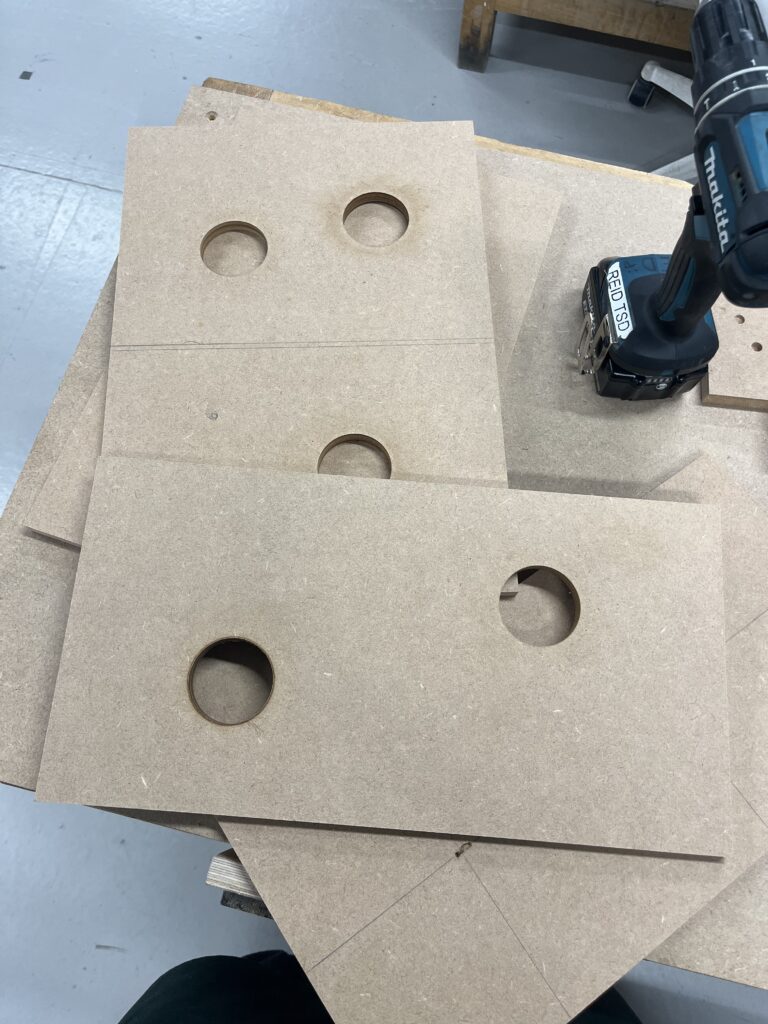
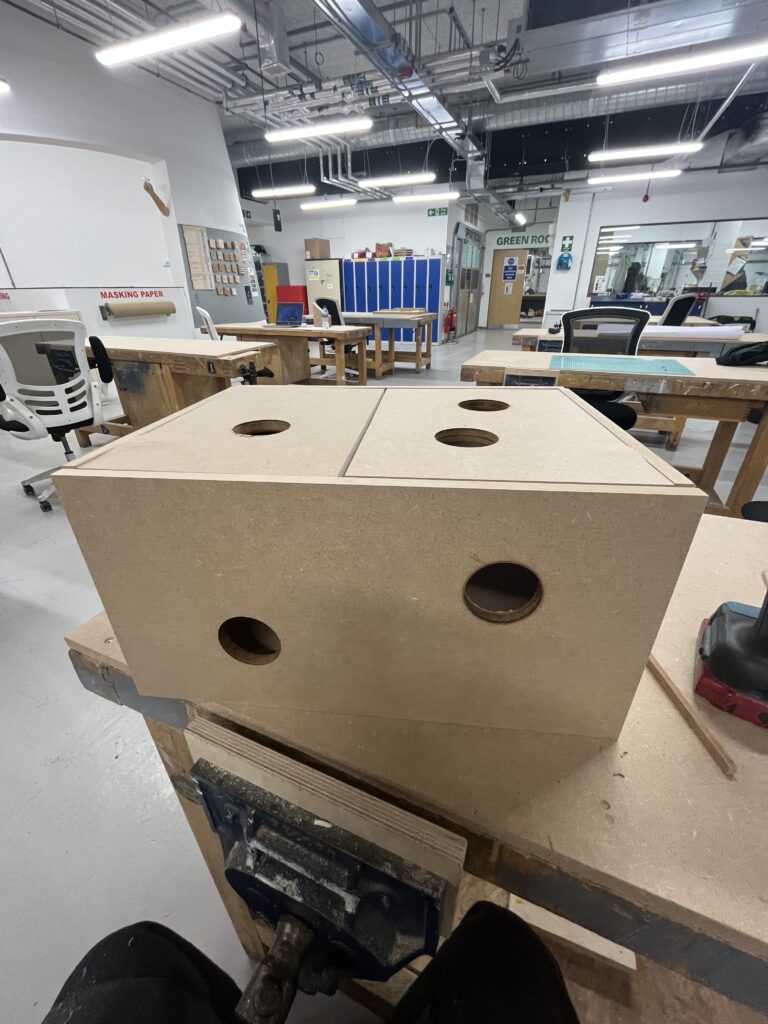
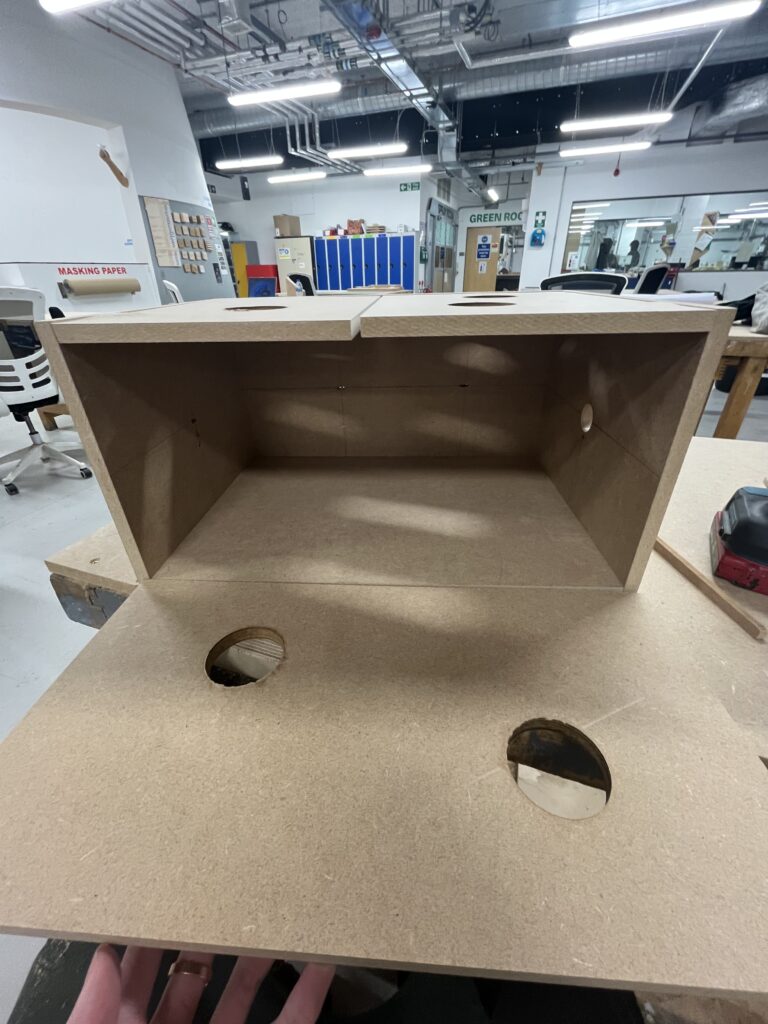
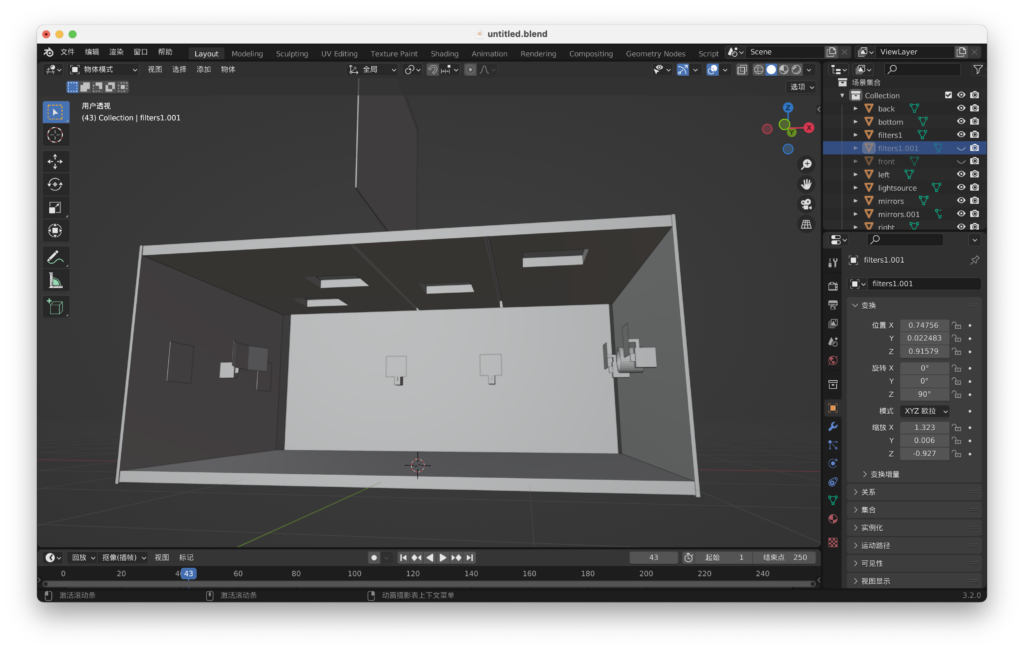
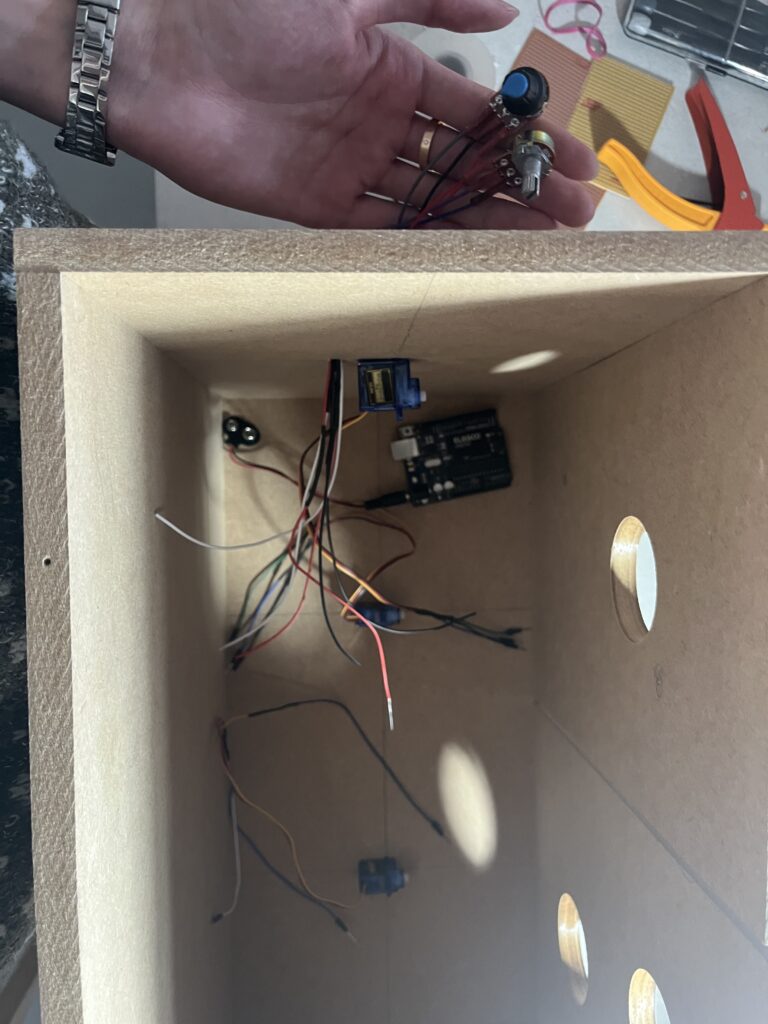
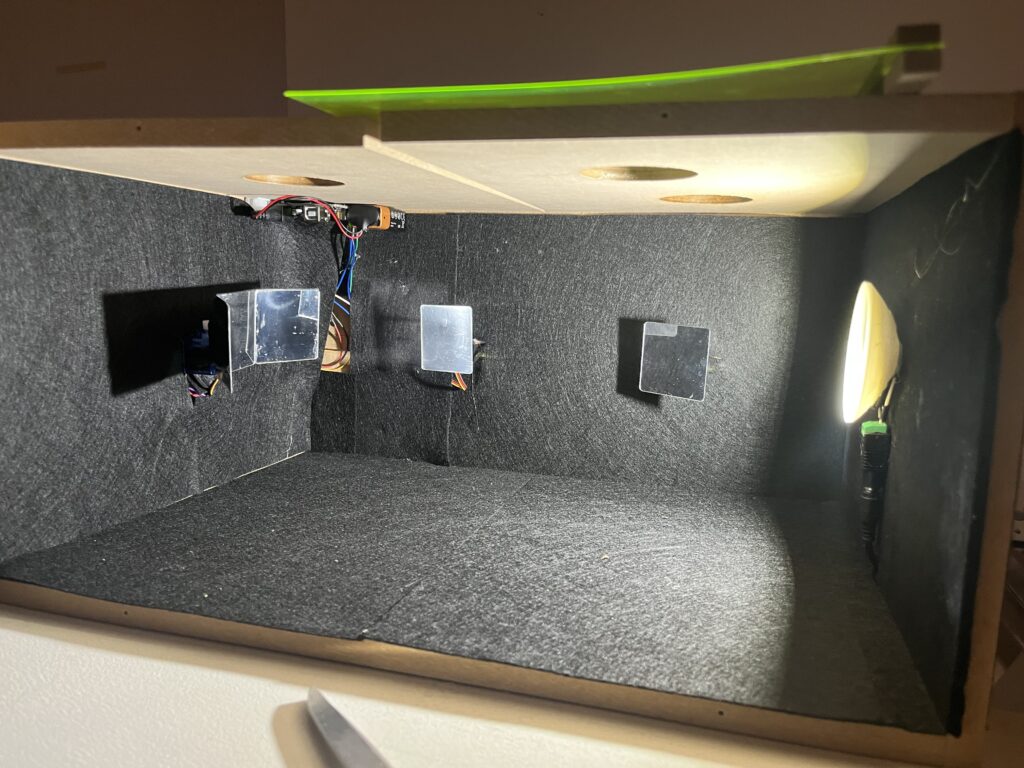
Due to the nature of the woodworking workshop, I am unable to achieve particularly precise cuts, so I have had to make some changes to the original design. The staff at the workshop have provided me with many valuable suggestions for improvements. I reduced the number of gaps left for the acrylic filter panels from two to one, which significantly improved the overall stability of the box. I changed the shape of the viewing window from a square to a circle; this meant I didn’t have to compromise the edges with hot-wire cutting, but could instead use a bench drill with a large drill bit to cut out the shape I wanted. This proved to be a good design choice, as the circular shape makes the square box look less monotonous. I pre-drilled holes for every servo, potentiometer, set of wiring harnesses and, most importantly, the LED light source. I secured every panel except the front one with nails, making it rock-solid. This means I can take it back to the studio for the next stage of assembly and fabrication.
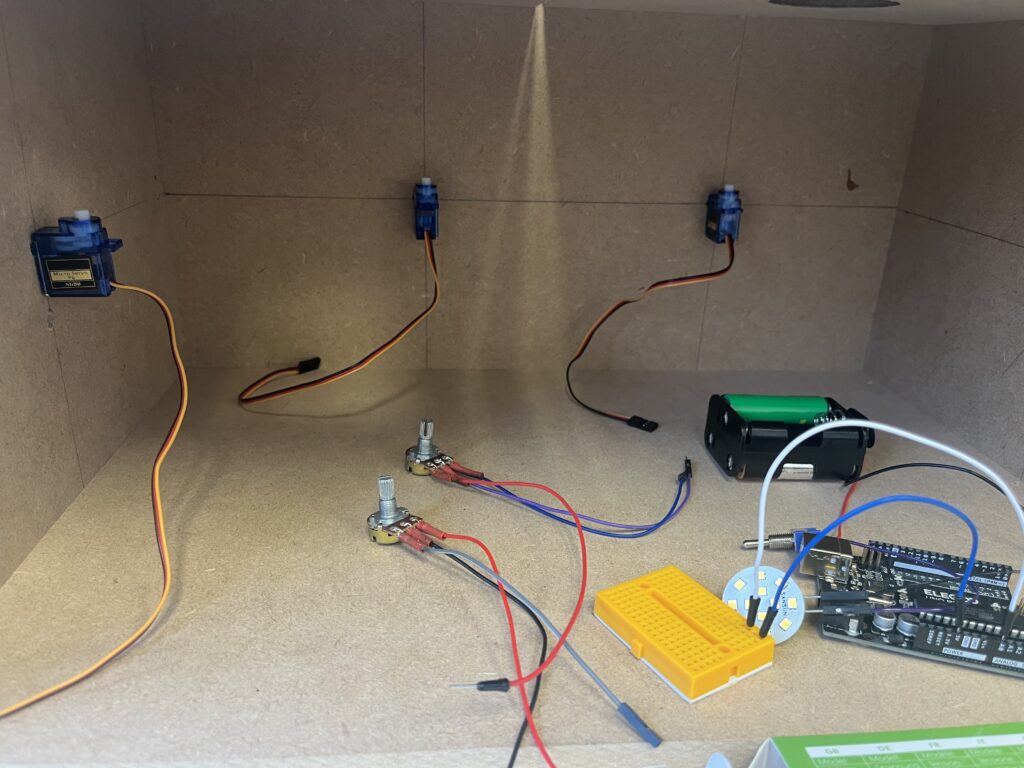
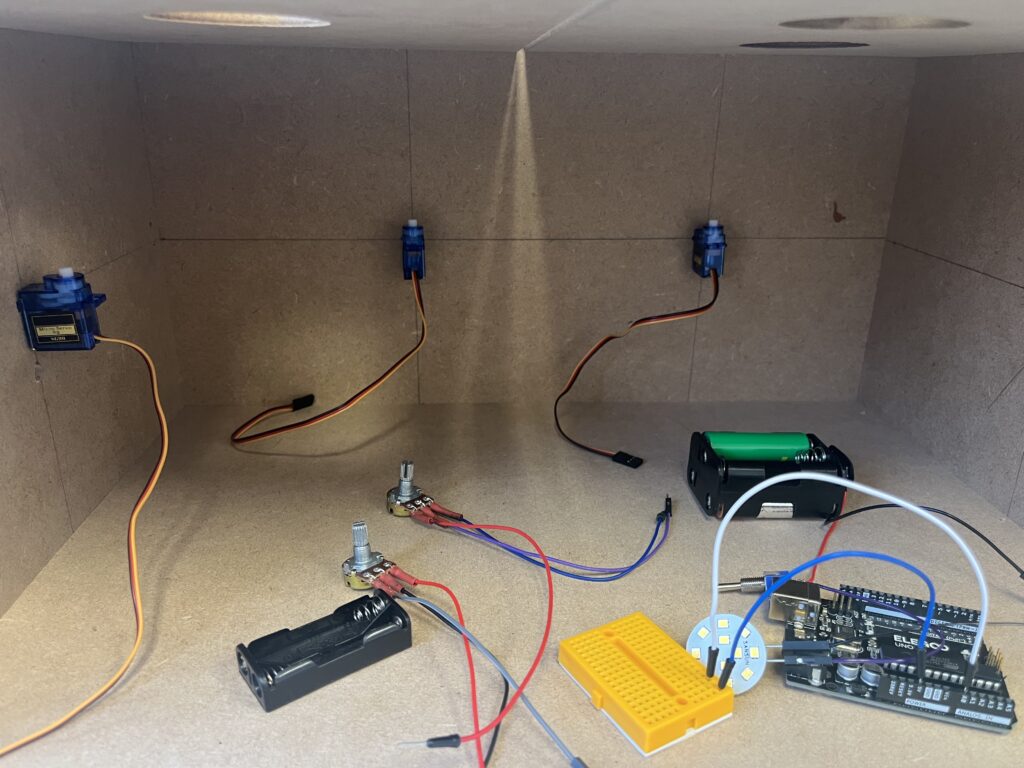
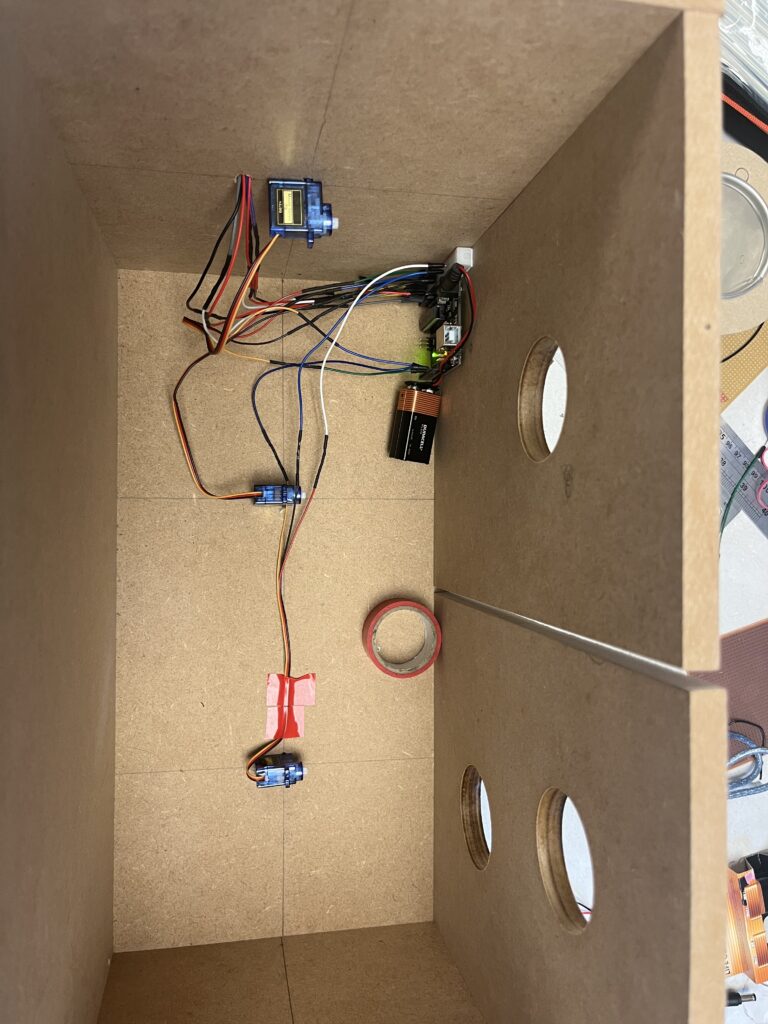
Back in the studio, I started by fitting each servo in place, then spent some time thinking about how to programme their movements and operations. Most importantly, I had to figure out how to fit all the electronic components into this box. I needed to plan the routing of each component and group them together to conceal them. I wanted to hide these mechanical and electronic elements as much as possible, not simply to make the whole project look tidier and more organised, but because I wanted to eliminate all external distractions in this project, allowing the audience to become more immersed in the fascinating sensations that this light box and the light itself bring them.
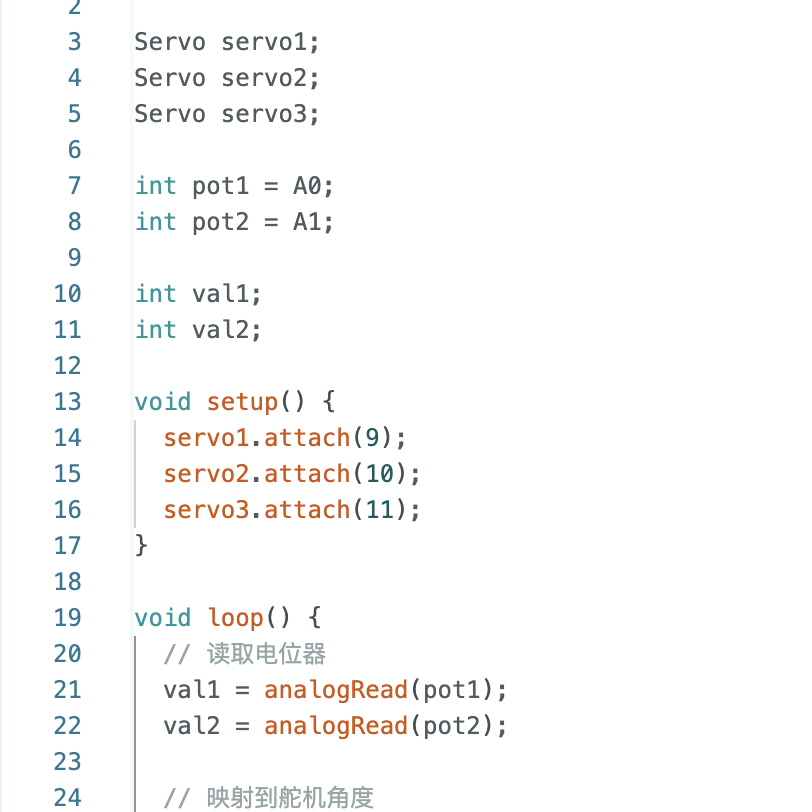
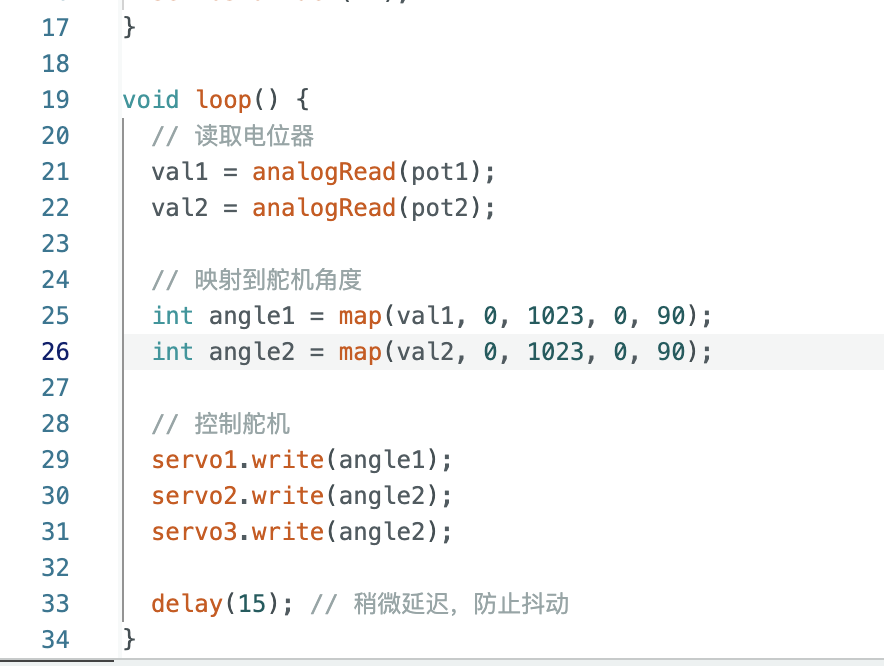
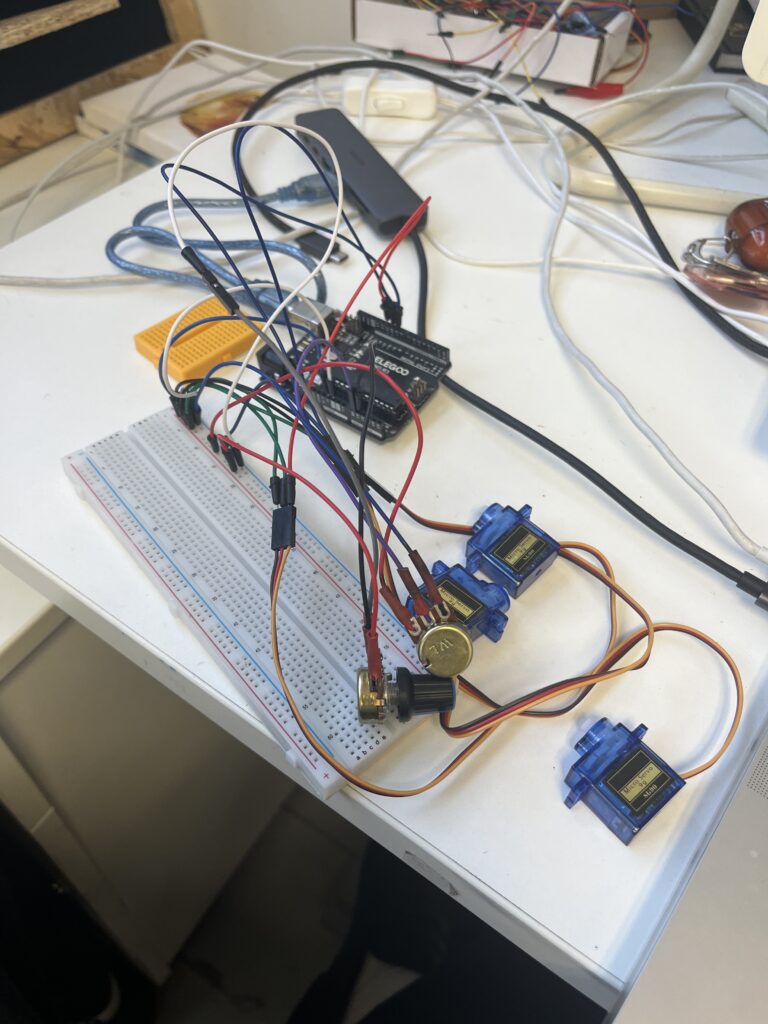
I’ve already carried out some testing on a breadboard and edited the code. This means that when I assemble the project, I simply need to connect the components correctly in the correct pin order. Furthermore, as the number of servos has been reduced from five to three, I don’t need to worry about providing separate power supplies for them. A single 9V battery is sufficient to power the Arduino Uno board itself. There are two potentiometers and three servos in total. Potentiometer 1 controls the primary servo (Servo 1), which is used to directly reflect the light source. Potentiometer 2 controls servos 2 and 3, which rotate in unison. I have set all the servos to an angle of 90 degrees to prevent them from moving too far.
I rewired each potentiometer and servo using solder. Once I had finalised the position of each component and the length of the wires, this proved to be the most efficient method. I made sure to protect every solder joint with heat-shrink tubing, so that I wouldn’t encounter any unexpected issues during assembly.
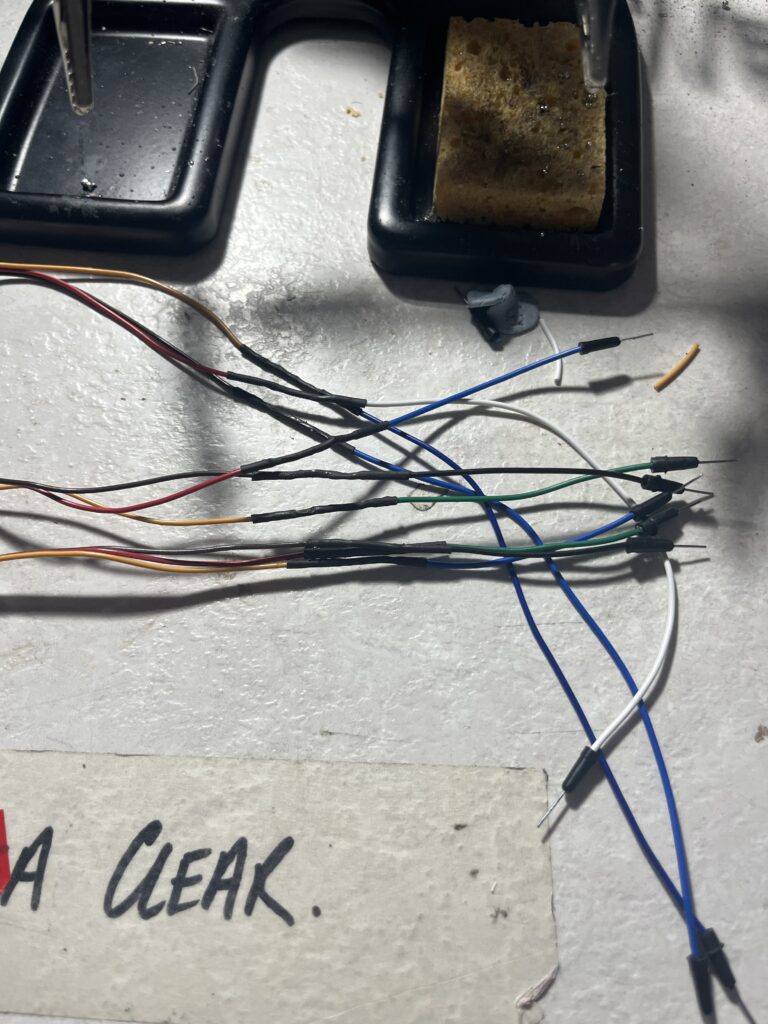
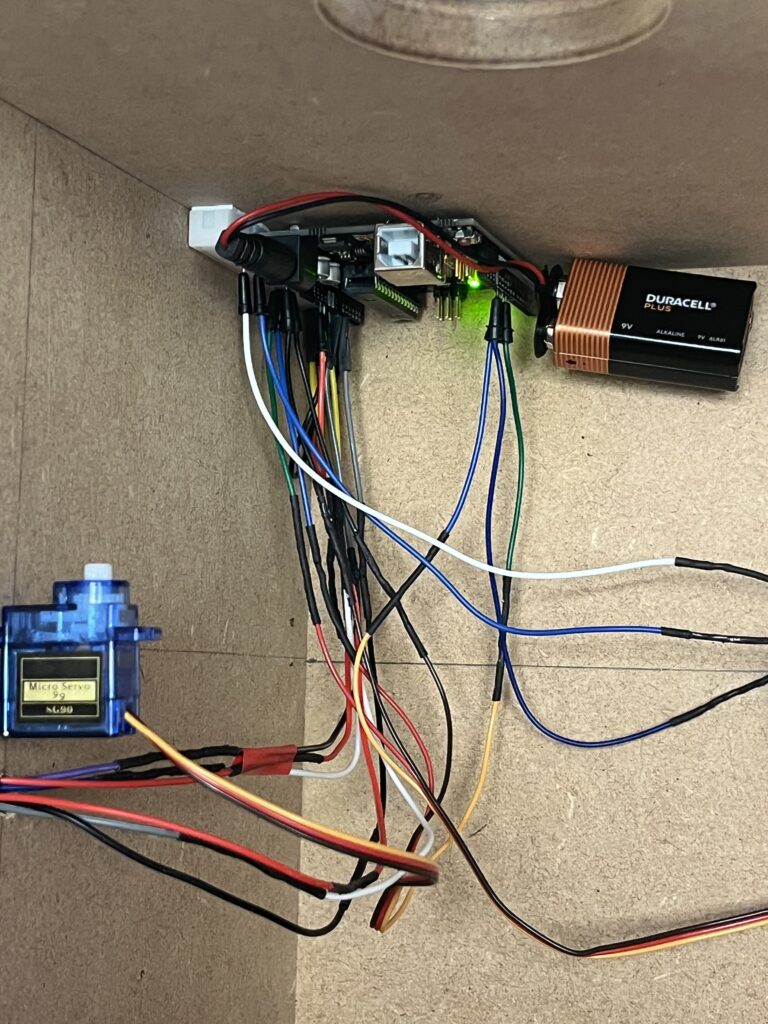
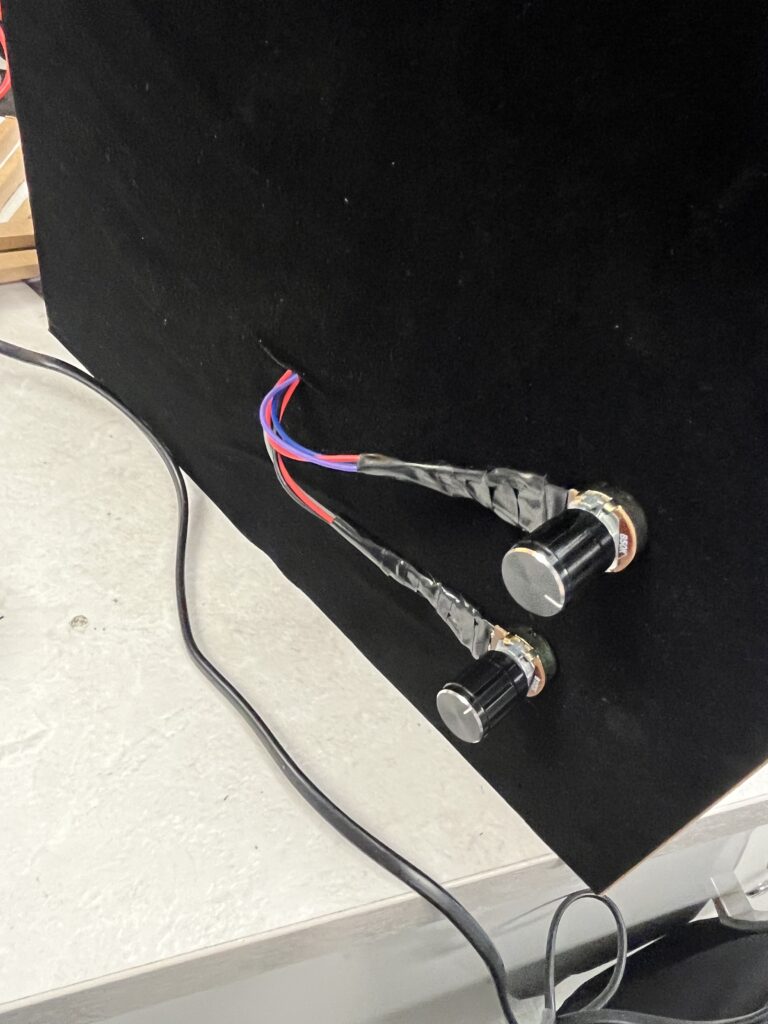
As the LED bulb requires a 12V voltage, the wiring needs to be routed separately from the other side, and it also requires a separate power supply. I purchased a power supply with a three-pin plug that fits a DV connector online, and I also found an adapter for the DV connector. This means I simply need to connect the LED to the positive and negative terminals. At the same time, as the potentiometer—which serves as the control stick—needs to be positioned on the outside of the box, some of its wires are exposed. I wrapped them in black insulating tape for protection; this colour also helps to give the overall appearance a more cohesive look.
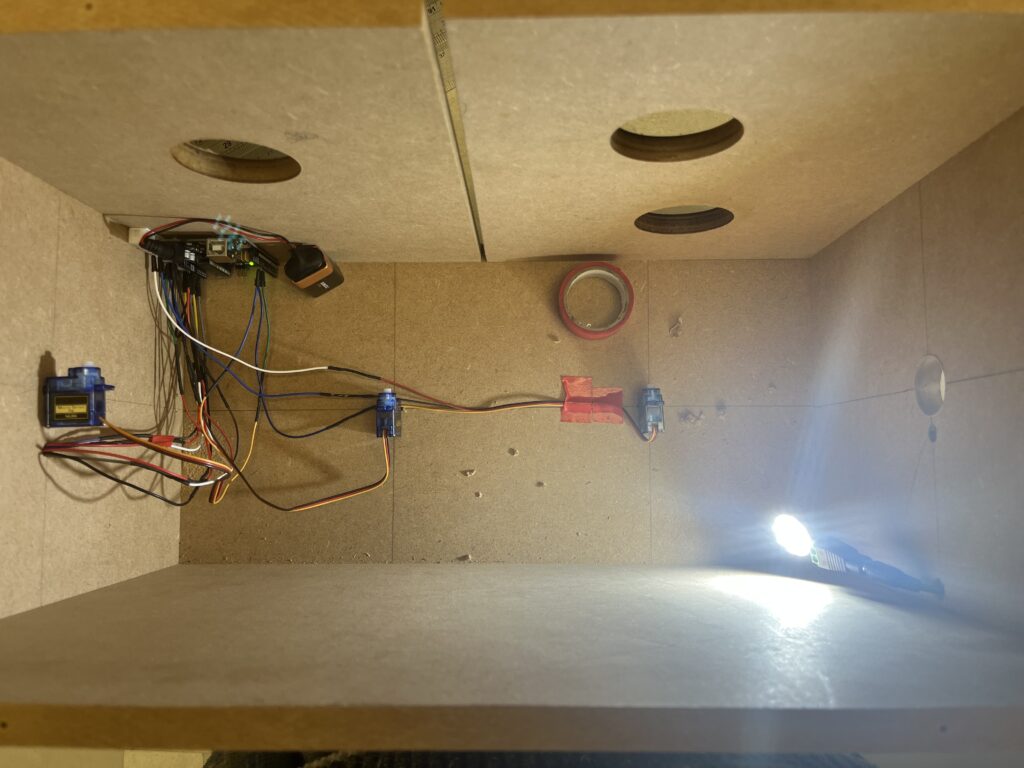
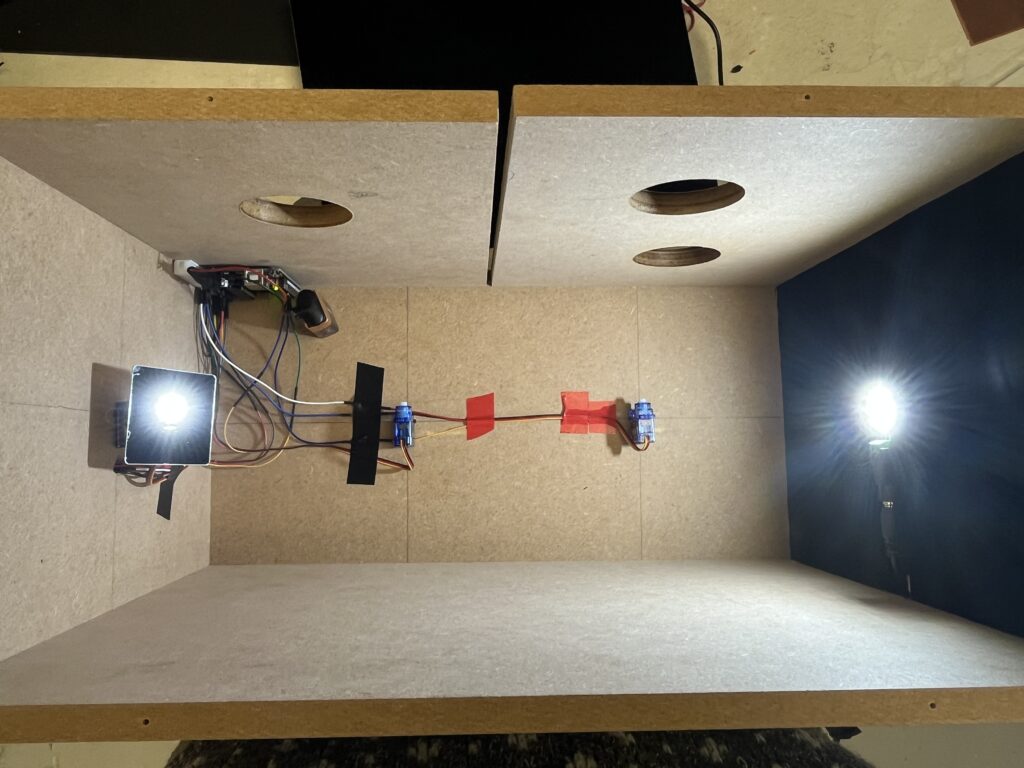
Once the initial assembly was complete, I carried out some tests—the results looked promising. I still needed some lining to fit inside the box. I opted for these black felts; they are soft and opaque, allowing me to cover the wiring harness whilst keeping the light reflection inside the box more manageable.
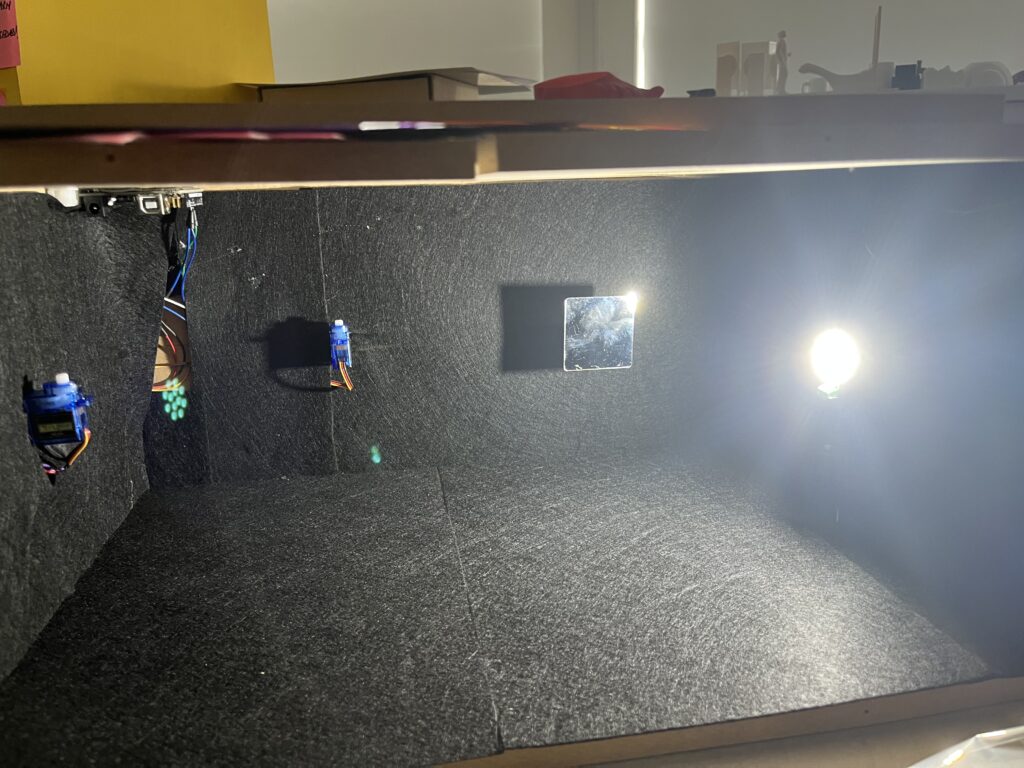
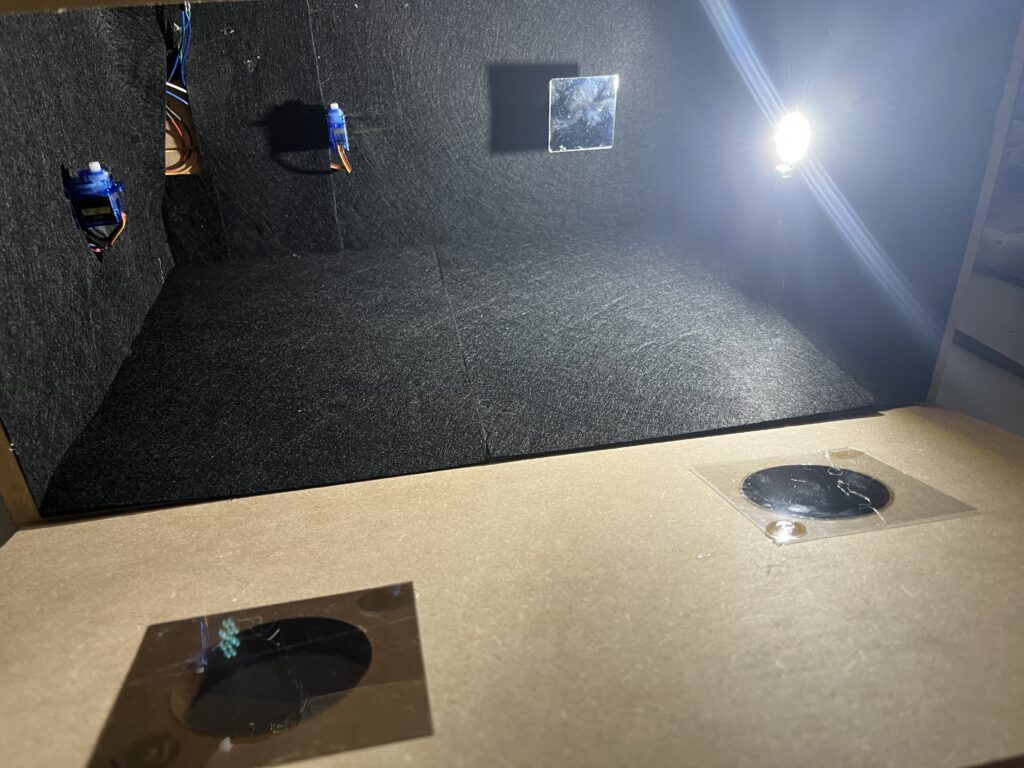
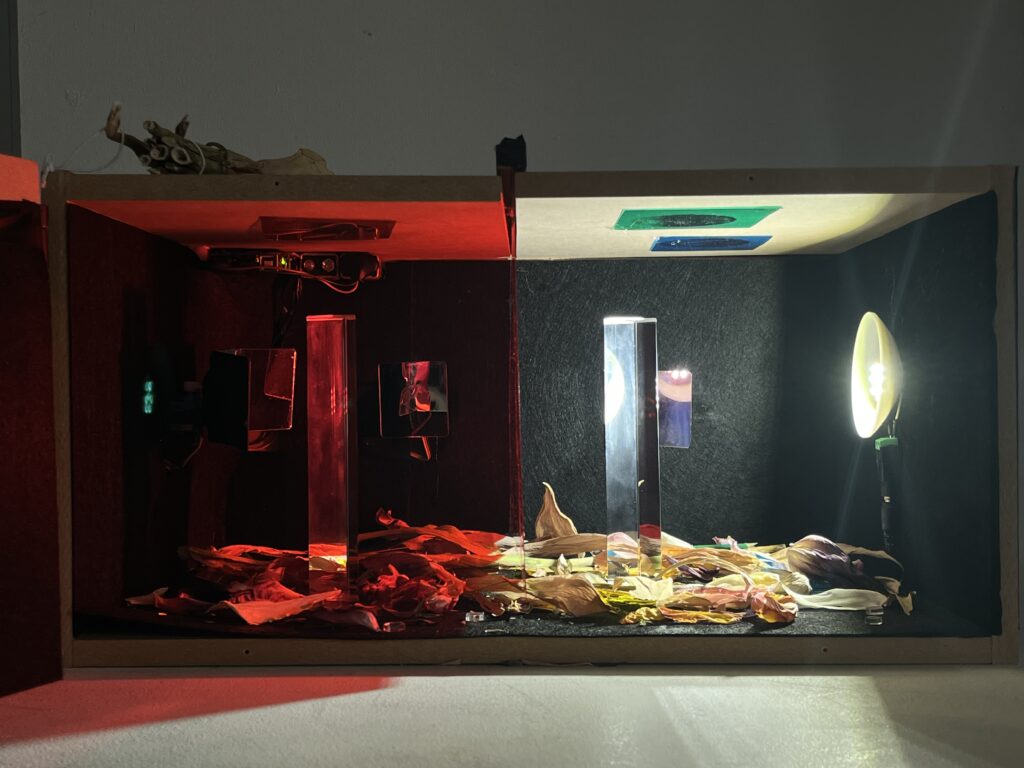
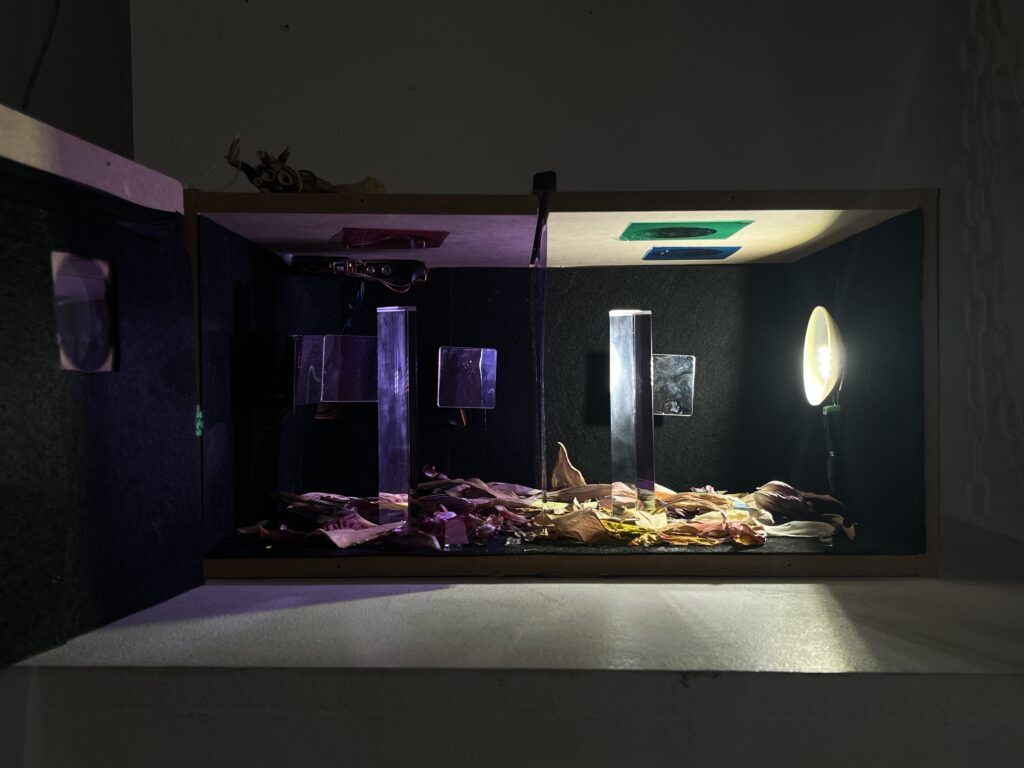
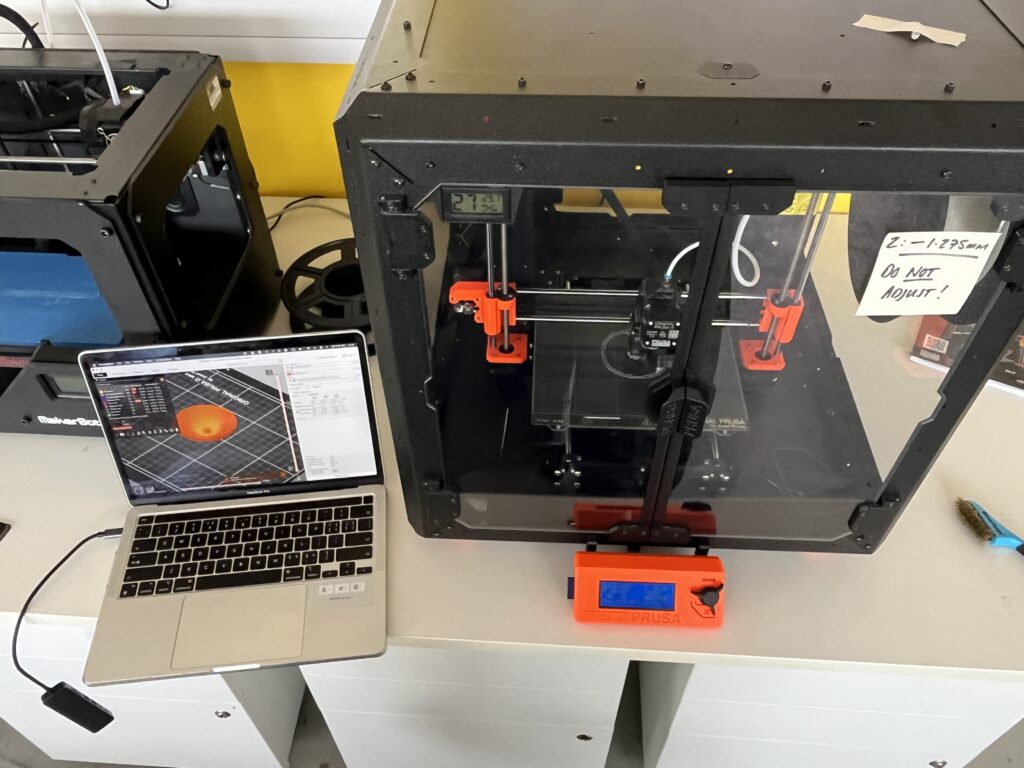
Whilst conducting the tests, I realised something else. My LED was too bright, resulting in the light covering too wide an angle, which meant that the reflective effect of the servo-controlled mirror wasn’t particularly noticeable. I therefore needed to make a ‘reflector cup’, much like the one on a torch, to confine the light emitted by the central bulb within a specific area and direct it straight ahead. I decided to 3D-print this ‘reflector cup’ as it was a simple task. I took some simple measurements: my LED has a diameter of 26 mm and a focal length of 18 mm, so the reflector cup should have a diameter of 70 mm. These figures do not need to be particularly precise. It is important to note that I need to leave two 1.2 mm pin holes in the reflector cup to connect to the LED pins and supply power to it.
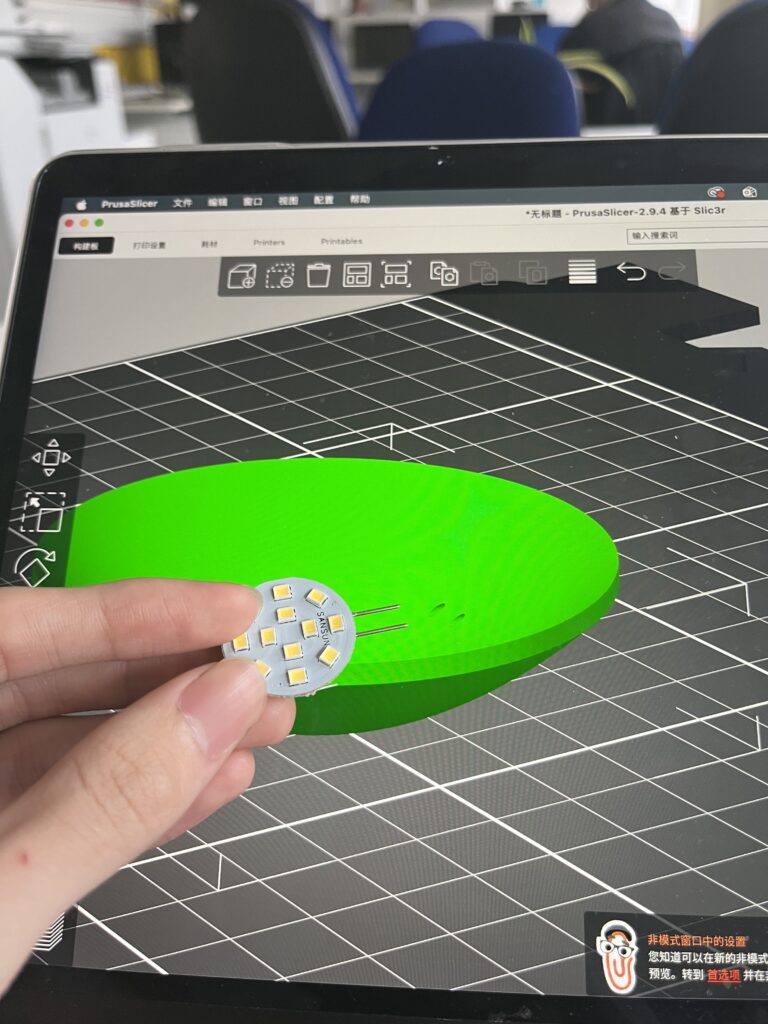
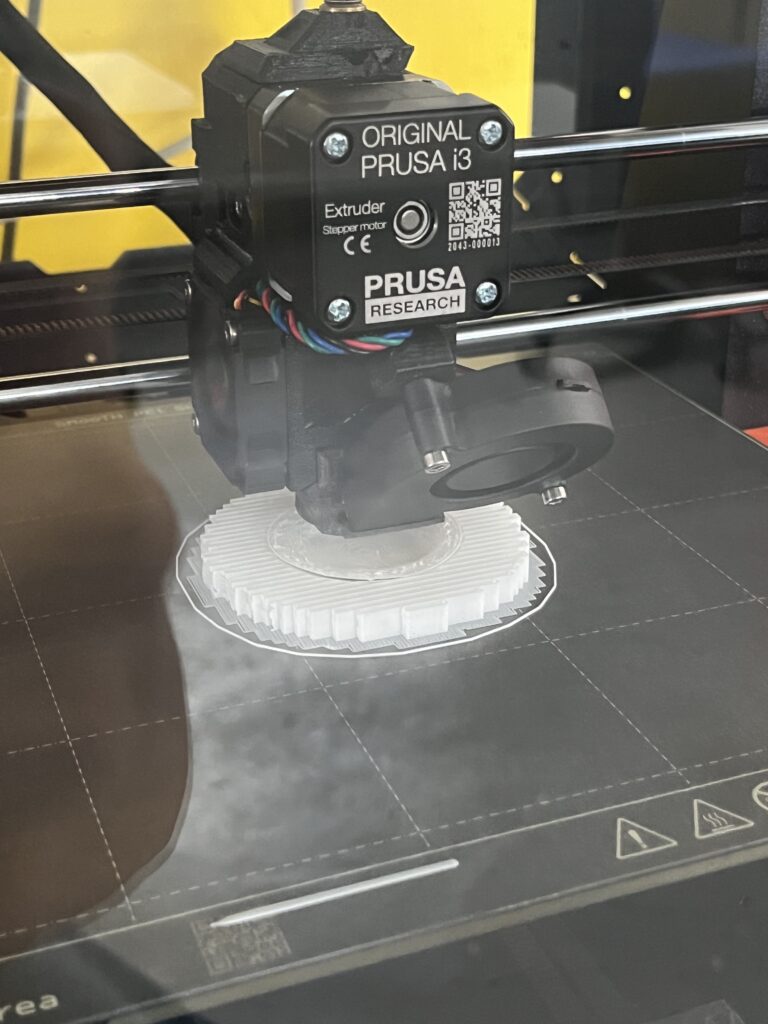
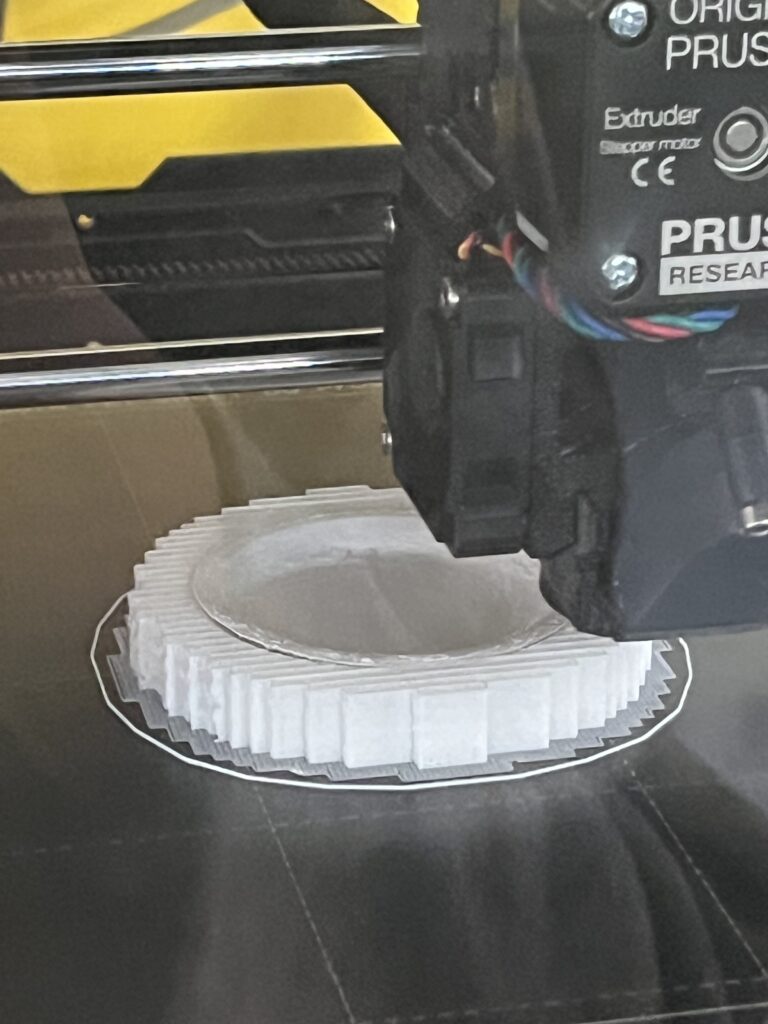
Once the printing was complete, I still needed to ensure that the reflector cup would reflect light. I used some flexible mirror sheets left over from my previous research—they can be cut to size—and cut them into fan-shaped pieces, which I then stuck to the inside of the cup. I mounted the LED onto the reflector cup and re-soldered the wires, thus completing the optimisation of this part.
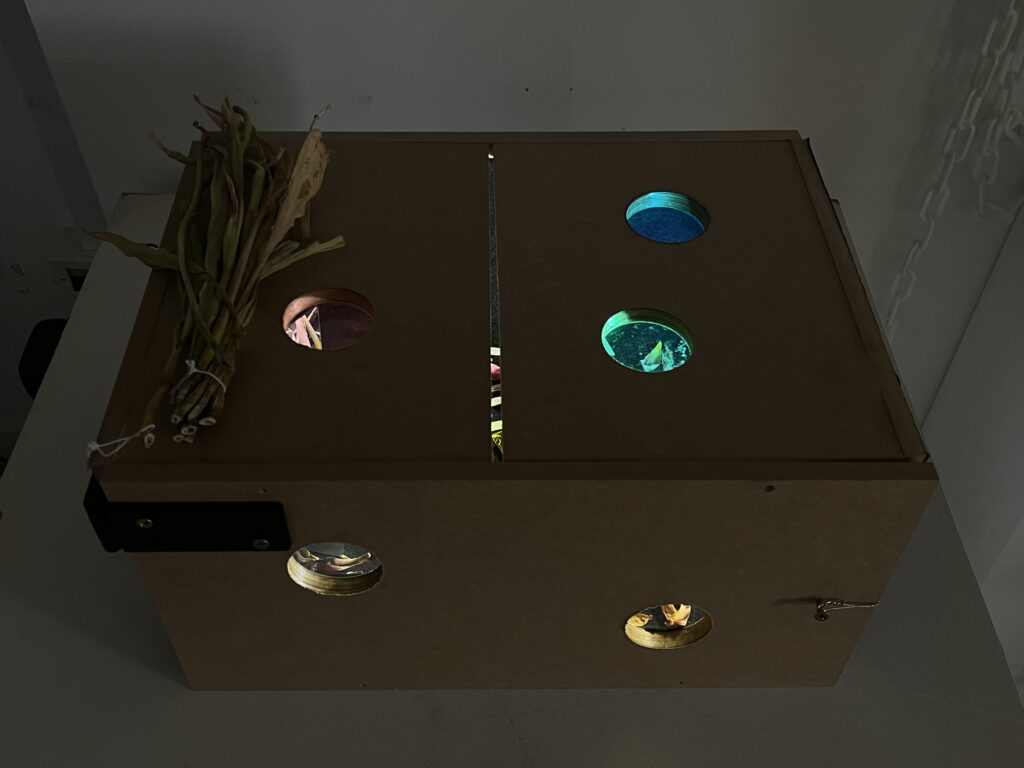
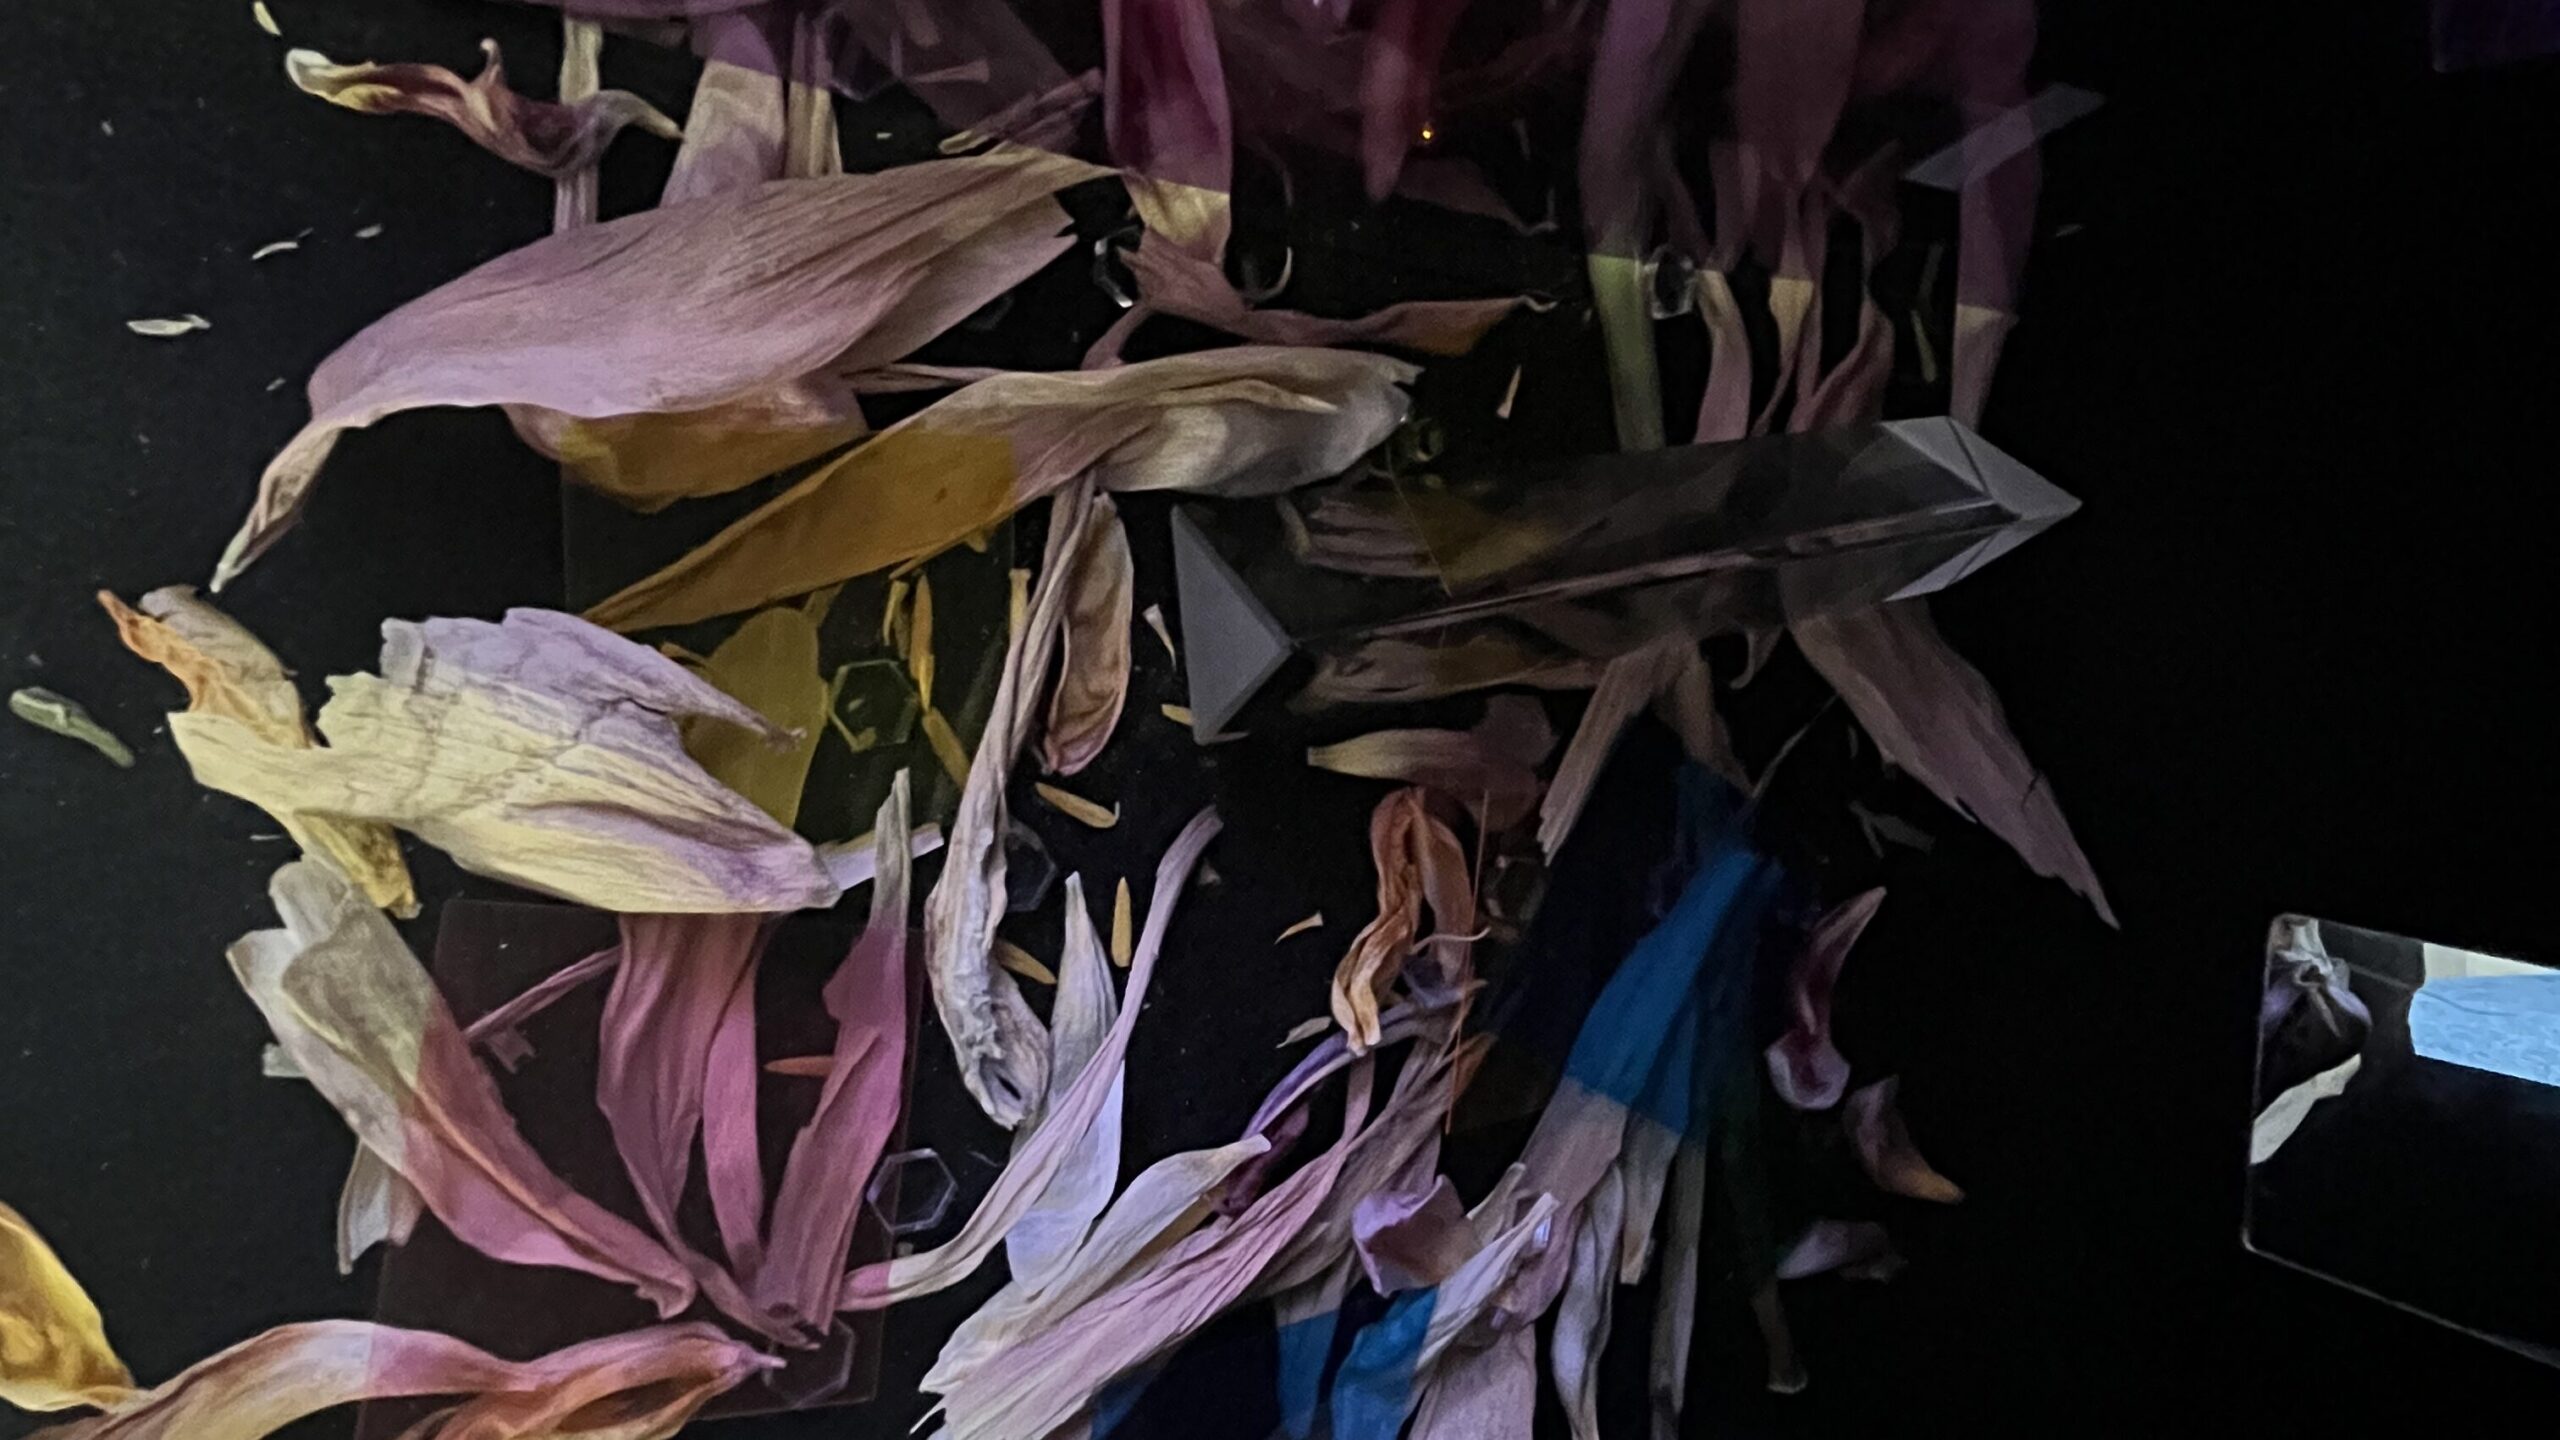
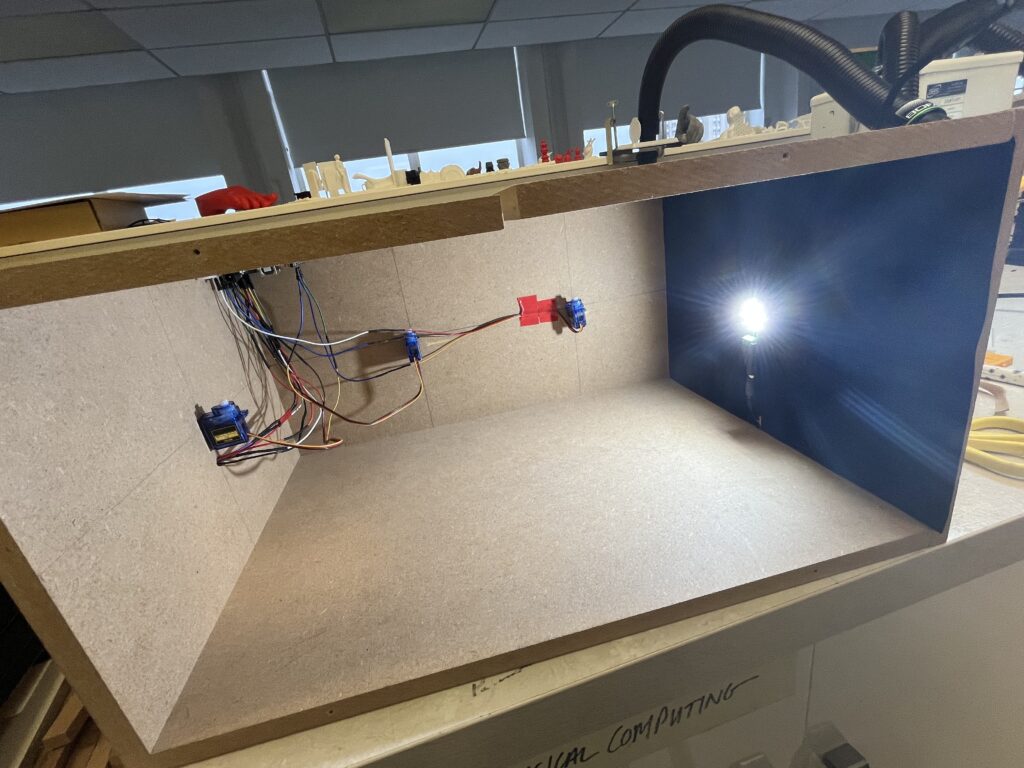
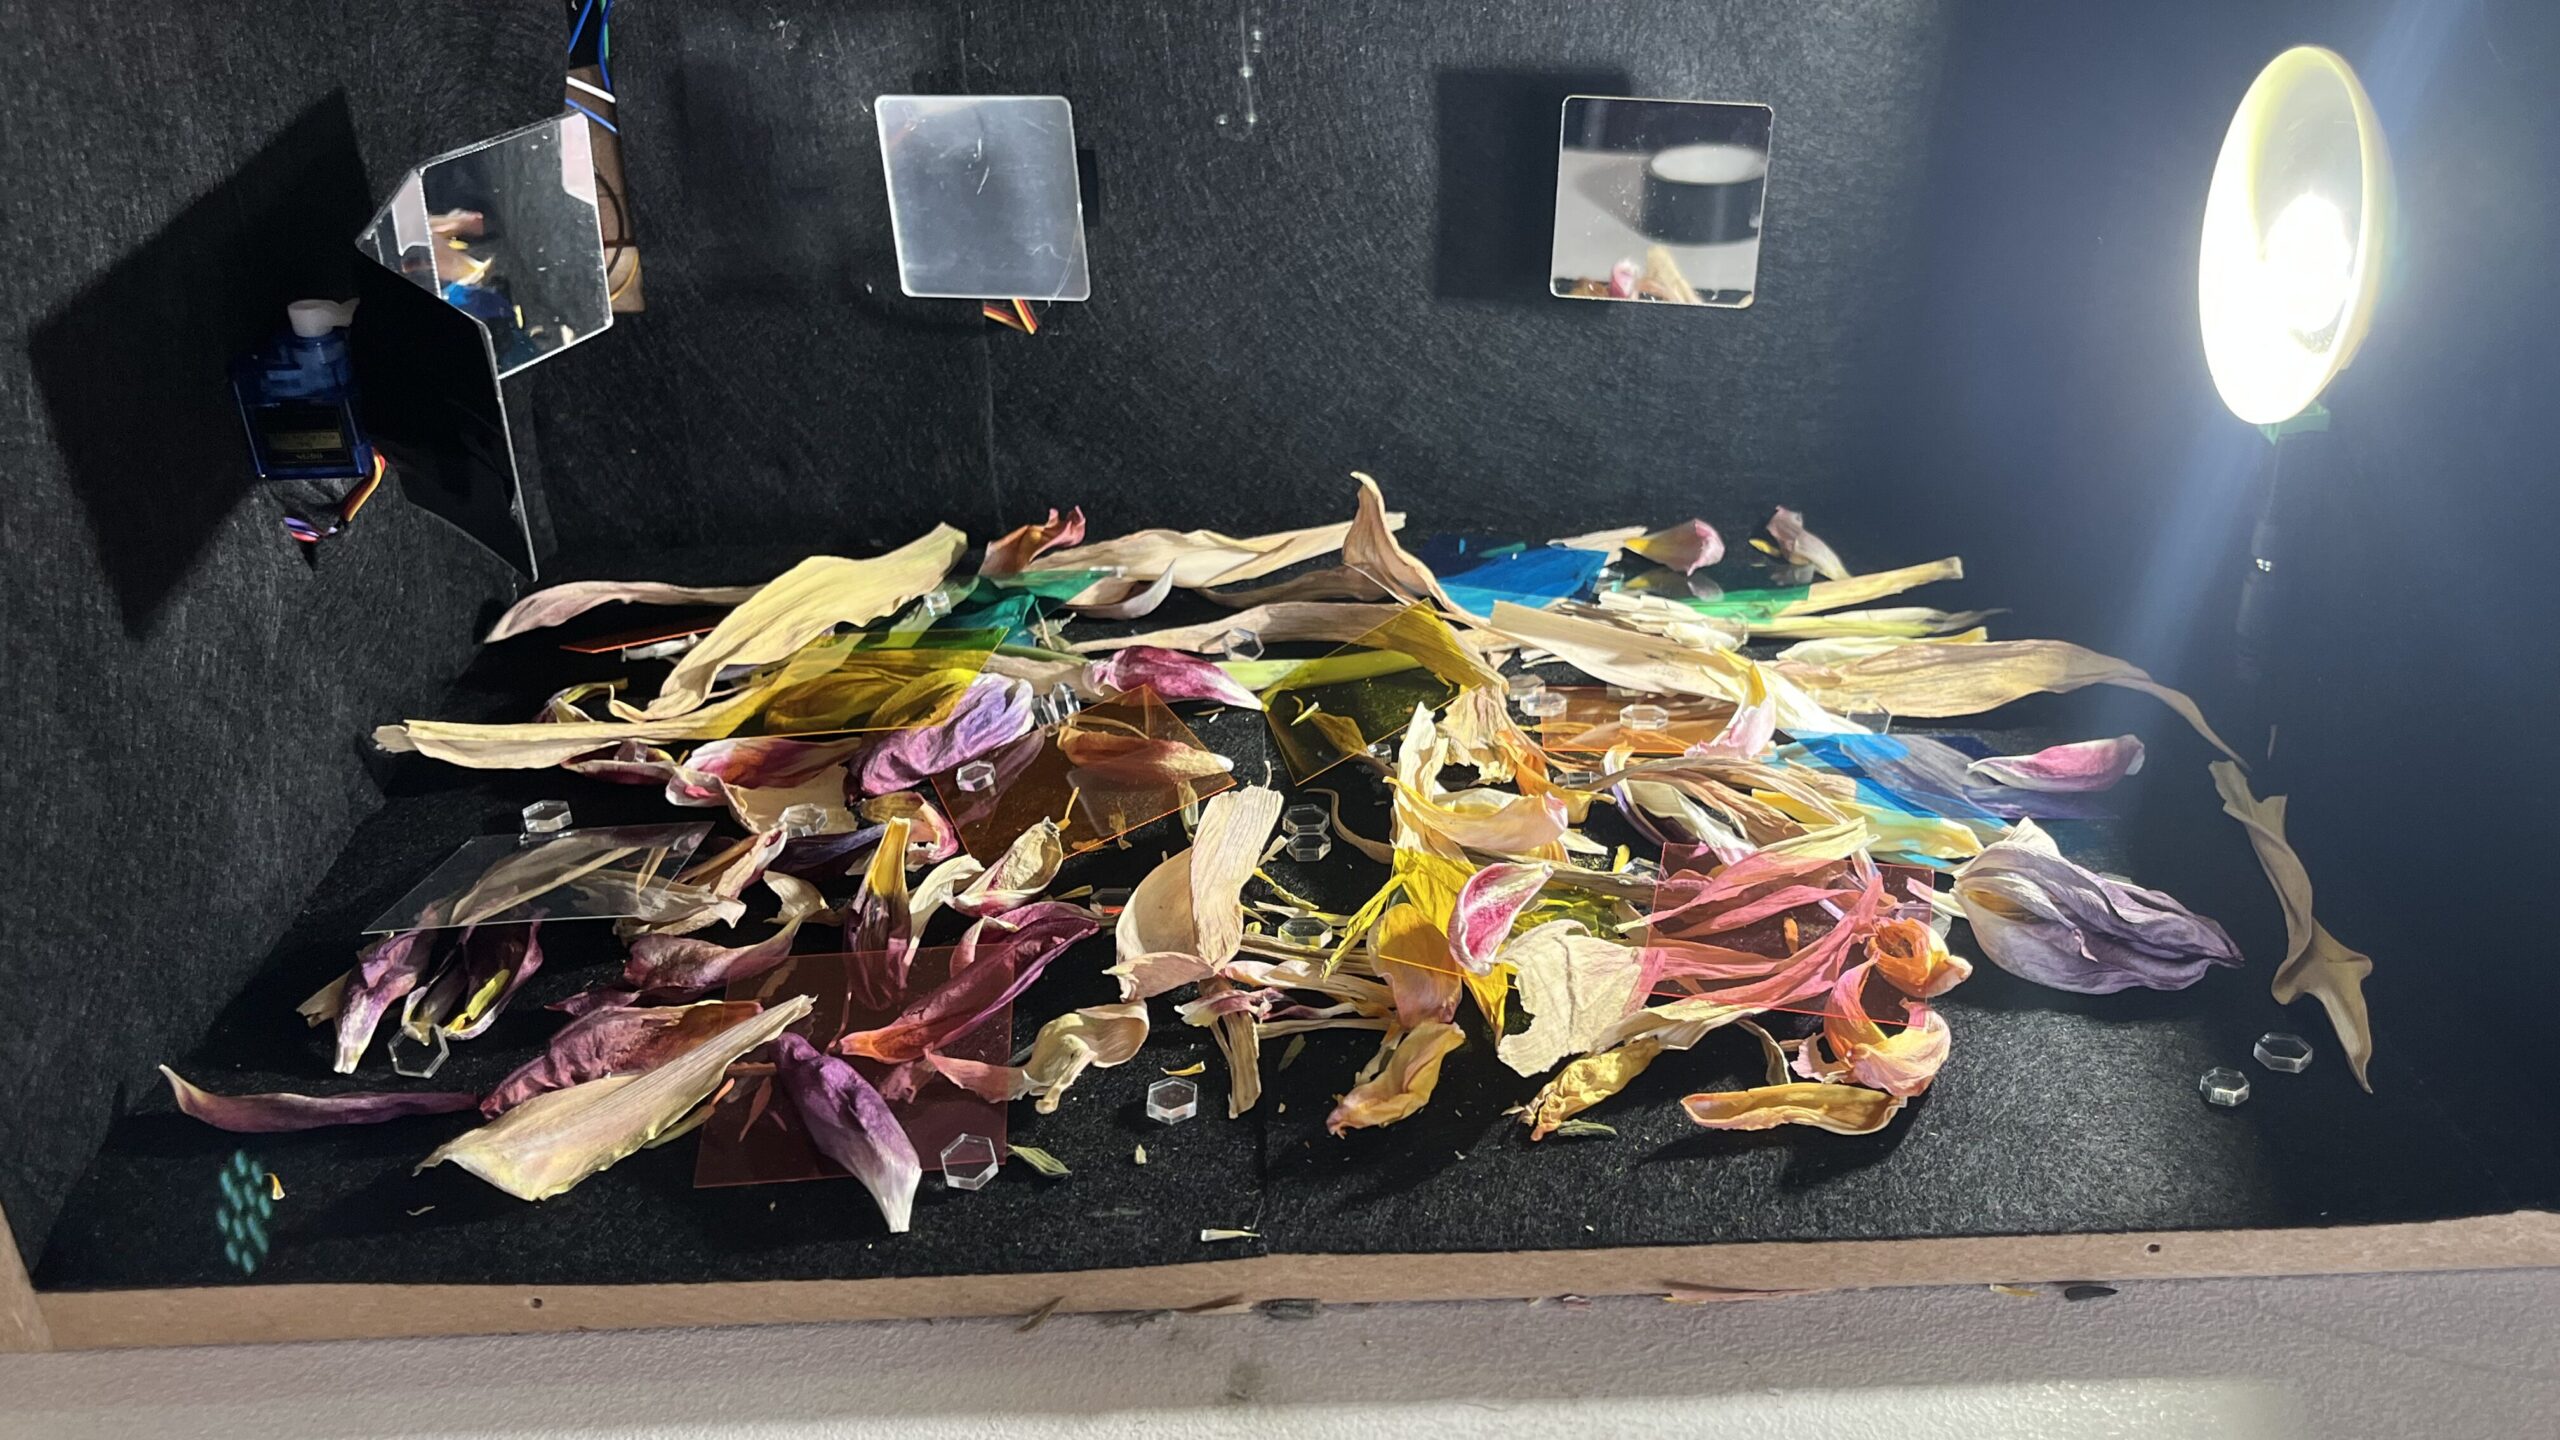
Finally, I fitted metal hinges to the front so that I could open and close the box freely. At this stage, the light box was beginning to take shape. Having completed the installation and testing of all the basic components, I then turned my attention to adding some stylish decorative touches. I attached acrylic panels of different colours to each viewing window, so that the colours seen through each window are distinct. I found two prisms and placed them inside the box; the prisms split the light into three colours, creating a completely different effect and experience. Finally, and this is my favourite part of the design, I spread some dried flower petals evenly across the bottom of the box, mixed with small pieces of coloured acrylic and some reflective hexagonal plastic beads. As for why I chose petals, it’s because in Chinese, the word ‘kaleidoscope’ implies a scope containing millions of petals. Isn’t that lovely? Although you can’t actually see flowers inside a kaleidoscope when you look through it, you can see them in my little ‘kaleidobox’.
On the day of the exhibition, I placed it in a quiet, dimly lit corner. I really enjoyed watching it there, with light streaming through the colourful little windows, inviting you to observe and play with it. I used a small smoke machine to add a touch of atmosphere. I received a lot of positive feedback—thank you all. For me, this is more of a toy than a work of art. I wanted people to experience a sense of ‘rediscovering their inner child’ through interacting with it, rather than viewing it as a serious art installation. For me, approaching art—both creating and viewing it—with a critical and analytical mindset is incredibly exhausting, and it goes against my original intention for studying art. Admittedly, this isn’t a fully-fledged art installation, but I’m still grateful to Design Domain for giving me this opportunity to create some fun little things that I enjoy.